
Delete an Action from a Ticket
Action Note Buttons
Users can configure which action note buttons appear in their ticket toolbar by clicking the three dots icon and selecting Configure Toolbar Items.
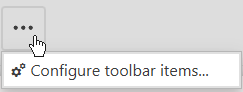
Select which tools you want included in your toolbar using the check box next to each icon. Once all desired tools have been selected, click the Save button.

NOTE: Tools can be rearranged by clicking and dragging the icons.
The tools available are as follows, in order of the below screenshot:


From left to right: Add an Action, Send Email, Action Note Filter, Share Ticket, Parent/Child status toggle, Add a Calendar Event, Apply template/workflow, Knowledge base, Print Ticket, Move or Merge, Related tickets, Assets, Split actions into new ticket
NOTE: Some options may not be available based on what your Administrator has set up.
Add Action to a Ticket
When adding an action to an existing ticket:
Click on the ticket, the ticket description page will appear.
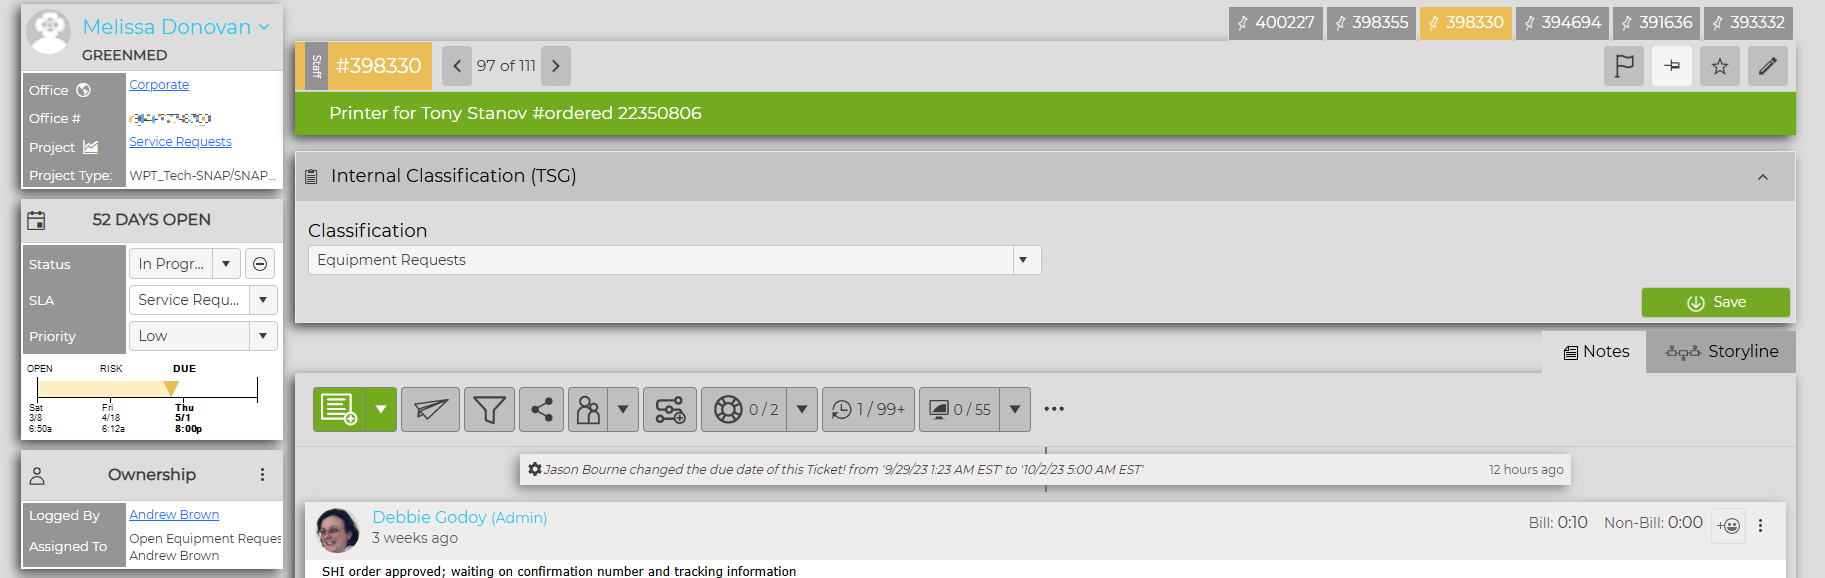
NOTE: If there are no attachments or the stopwatch feature is not used, the columns where the icon would show will not be visible.
If Profile images are in use, the image will appear at the beginning of the note. For instructions on adding your profile image, click here.
Add Action Note
- Click on the Add Action button at the top of the action list.

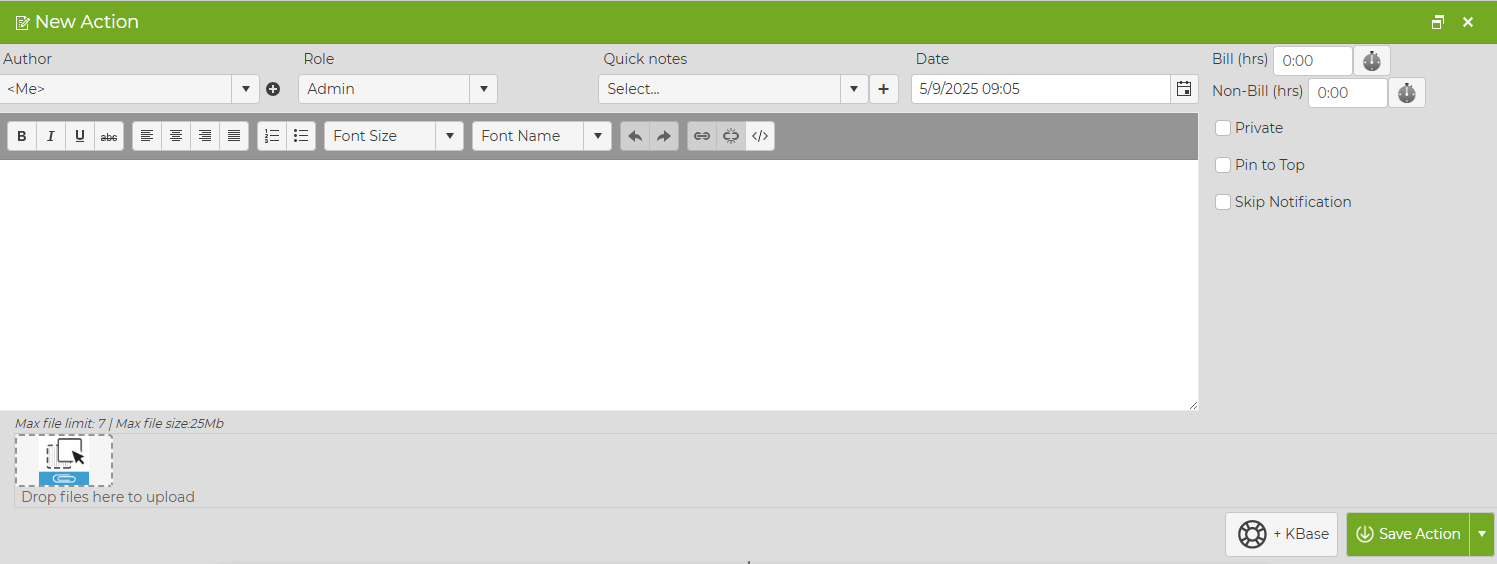
The default Author is the person logged into Revelation, and it shows in the Author window as <Me>. If you are entering the action for another staff member, select the appropriate name from the drop down in the Entered by area.
If the information is something you add regularly, check to see if there is a Quick Note in the system with the text. If not, you may want to ask your system administrator to add one.
Enter your notes, including the billable/non-billable time and rate.
- If for some reason, you decide this is not the correct ticket or the information should not be included, click on the X button to the right of the edit screen.
- You can use the HTML toolbar to edit the text size, color, list items, etc. if necessary.
- If active, a Check Spelling button will be available under the Action Note box.
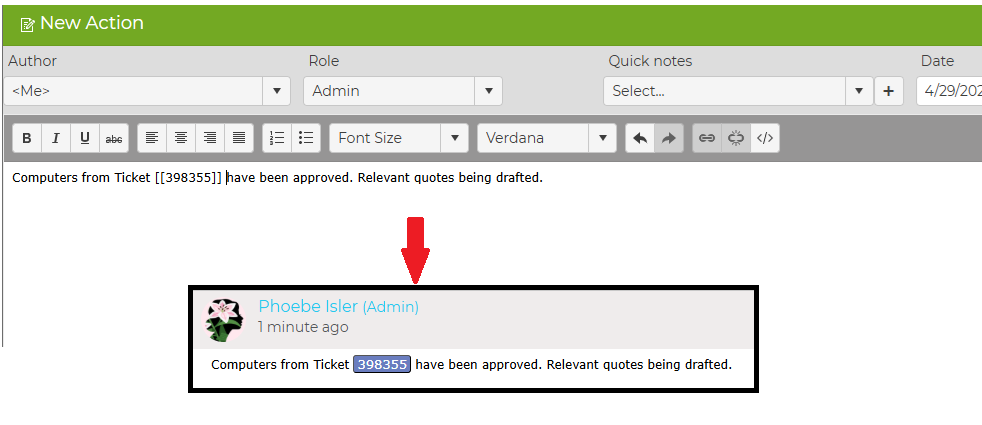
- If you need to refer to another ticket in Revelation, add the ticket number to the Action Note and surround it with double brackets. For example: [[123456]] will link to ticket 123456 in Revelation. The number will be highlighted in the title or in the action note.
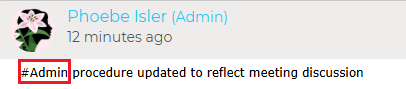
Adding a hashtag (#) to text within an Action Note, will allow users to search for the term from Quick Search or a full Search.

Quick Notes
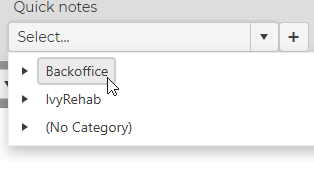
If you wish to use a Quick Note, select one from the drop down.
- If a Quick Note is not available, and you are authorized to add one, you may click on the add link to the right of the drop down to add a new Quick Note. If you are not authorized to add a Quick Note, this will not be visible.
- If set up in the Admin area, you may have Quick Notes for specific clients or groups within Revelation.

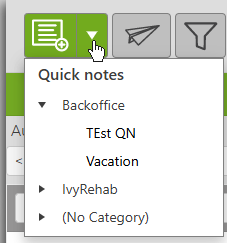
- You can also add a Quick Note by clicking the drop-down arrow next to the Add Action button. This brings up a Quick Notes tool tip. Follow the arrow to the appropriate Quick Note. It will open a new Action Note, insert the selected Quick Note, and allow you to update the billable/non-billable time, reassign the action, etc. as with any other new Action Note.

NOTE: The Quick Note will not change the Action Note until you hit Save.
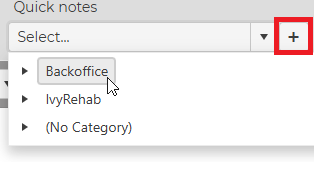
If you have permission, you will be able to create a new Quick Note by clicking on the plus sign to the right of the drop down in the Action Note.
- User and Manager levels will not be able to create draft Quick Notes; any Quick Note created by these levels will be published. Only Admin and Super Admin level users can create drafts.

If you want your action note to only be visible to internal staff, check off the Private box. (This feature must be enabled in Ticket Options to show.)
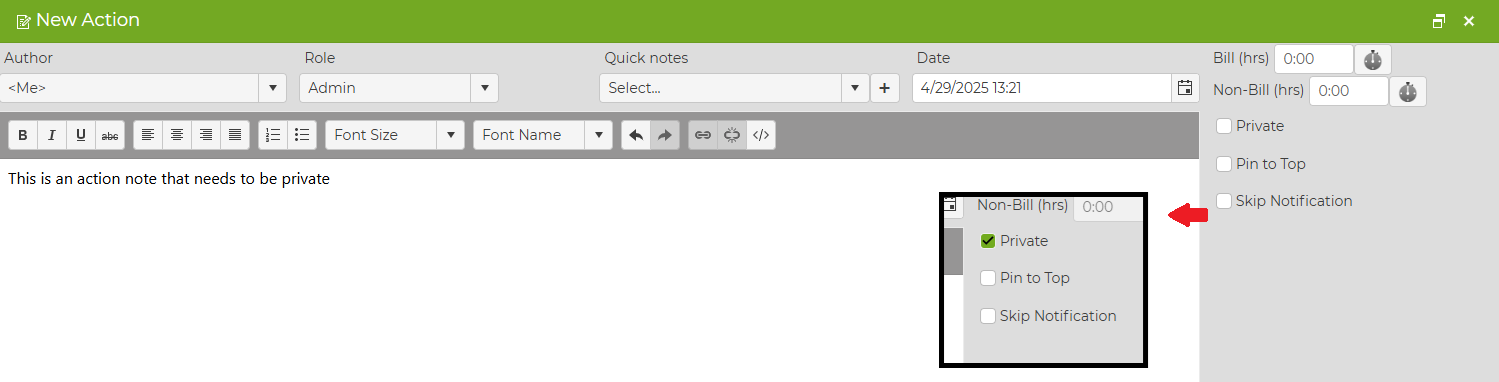
- A Private note is not visible to clients using the End User interface and it will not be printed in a report.
- Private notes may be available or visible to Staff Plus users, depending on the configuration.
- Private notes are not available to Core users.
Similar to pinning a ticket to the Dock at the top of the screen, this option allows you to pin an Action Note to the top of a ticket for quick access. This can be any important action note that needs to be easily viewable: the pinned note will appear green at the top of the ticket.
There will be a tool tip which shows who pinned the ticket. This is set in the Action Note Configuration section of the Admin area.
NOTE: When a note is pinned, the end user will see it, as long as it is not a Private Note, in the Self Service Interface.
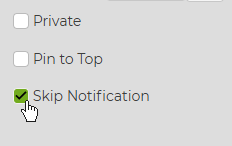
- Check the Skip Notification box if you don't want an email notification to be sent out by Revelation helpdesk when the action is saved. These emails are based on the settings in the Alerts area of the projects. This is set in the Admin area.

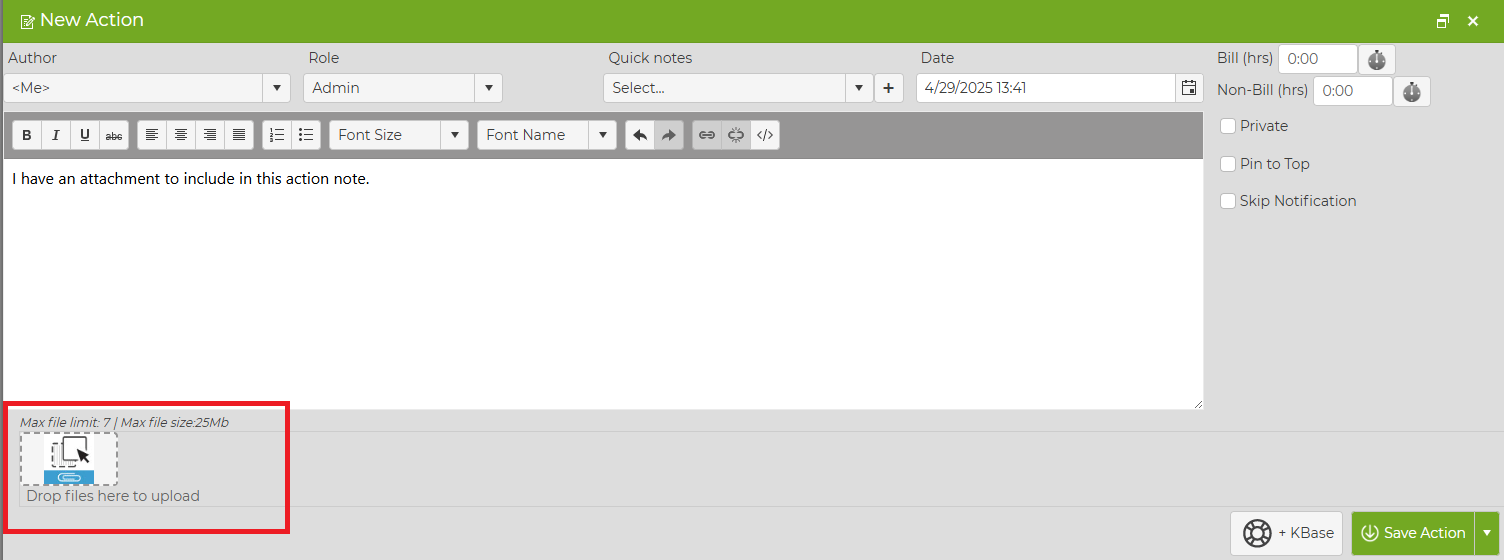
If Attachments is activated, you will be able to drag files from your computer to the note to attach it to the specific ticket. You can also click on the Attach button to browse your computer for the file to attach.
Click on Save Action when you are done. If you added an action to an existing ticket assigned to multiple users, the date actioned will appear in bold on their home page
To close this ticket, either use the status pull down menu on the left of the screen or simply click on the Close button next in the Timeline section.
If you want to pin this ticket to the Dock bar on your home page, click the Pin icon in the bar with the ticket number at the top.

Email within a ticket
By clicking the paper airplane icon next to the Add an Action button, users have the ability to draft and send an email entirely within Revelation. It will automatically copy that email into an Action Note upon sending. For more information, see Sending Email in this help guide.
- NOTE: To ensure this is working, Administrators must enable "Email to Ticket Action Note" under Email Settings.
- You will receive a notification if the email was successfully sent. When completed, the text will be included as part of the ticket as a note. There will be an email icon at the start of the note.
- If available, you may apply an existing template or workflow to the ticket. For more information on this, see Convert Ticket to Template or Workflow in this help guide.
Add A Knowledge Base Article to Action Note
Users have the ability to link to a Knowledge Base article not only from within an existing ticket, but to a specific action note as well.
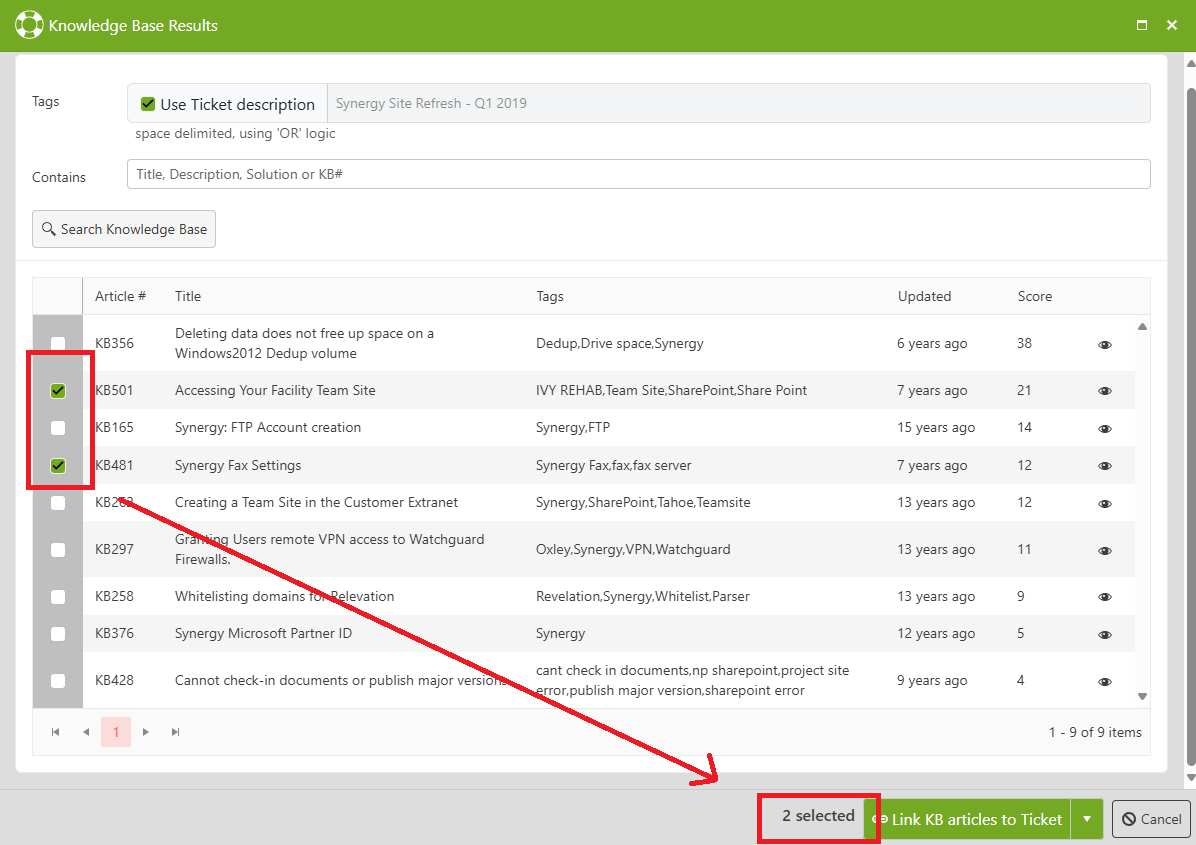
Select the Knowledge Base icon so that the ticket selection window pops up. Click the check boxes to add the specific article(s) that need to be linked.
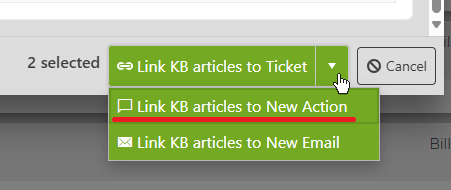
To add the links to an action, click the drop-down arrow and select Link KB Articles to New Action.
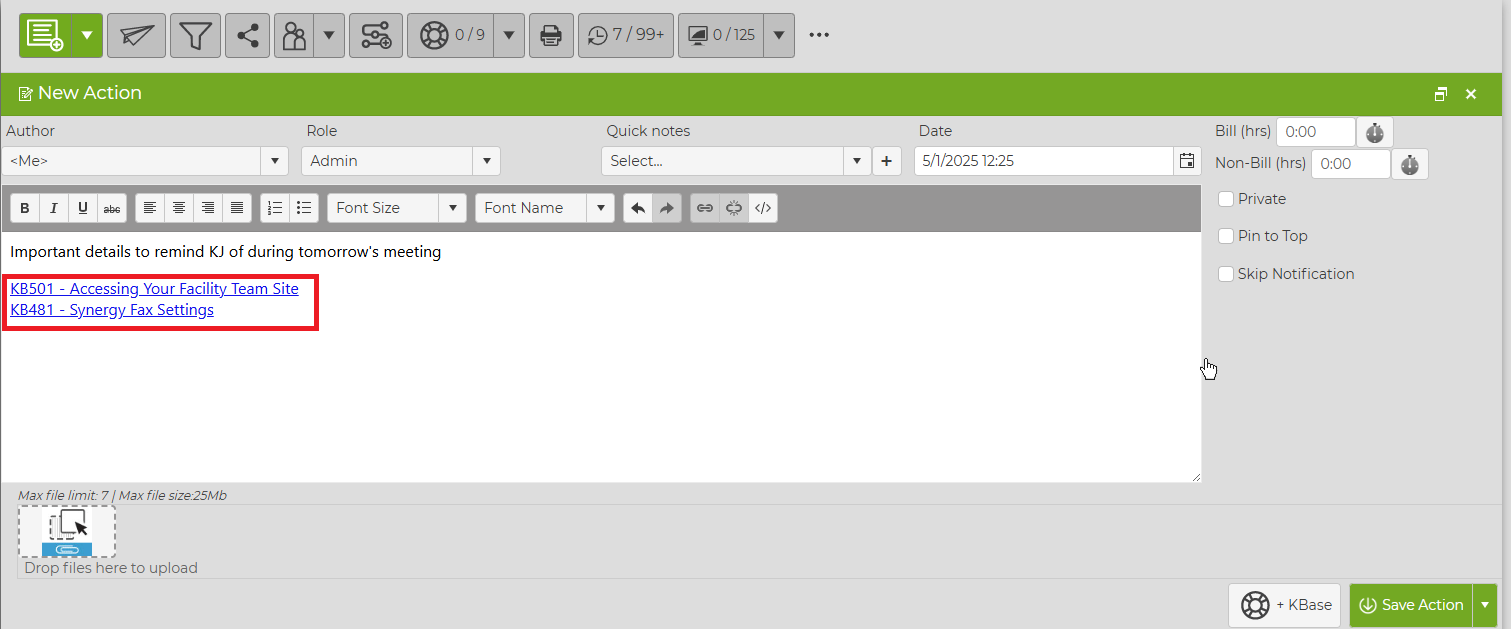
Revelation will open a new Action Note that includes the relevant links - users can edit the action description, time, and any other details needed.
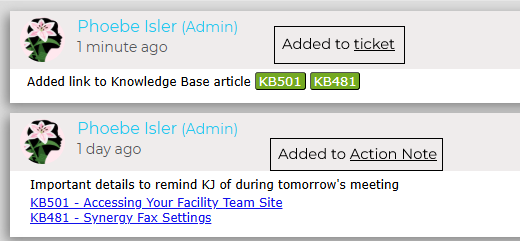
Once saved, the Knowledge Base articles will be saved as links within the Action Note.
NOTE: This will appear differently from the way Knowledge Base articles look when added to tickets (shown below)
Add Knowledge Base Article to Email
Users can also add Knowledge Base articles to an email being sent within a ticket. By following the steps above and selecting Link KB Articles to New Email, Revelation will create a new email draft within the ticket and link the articles accordingly.
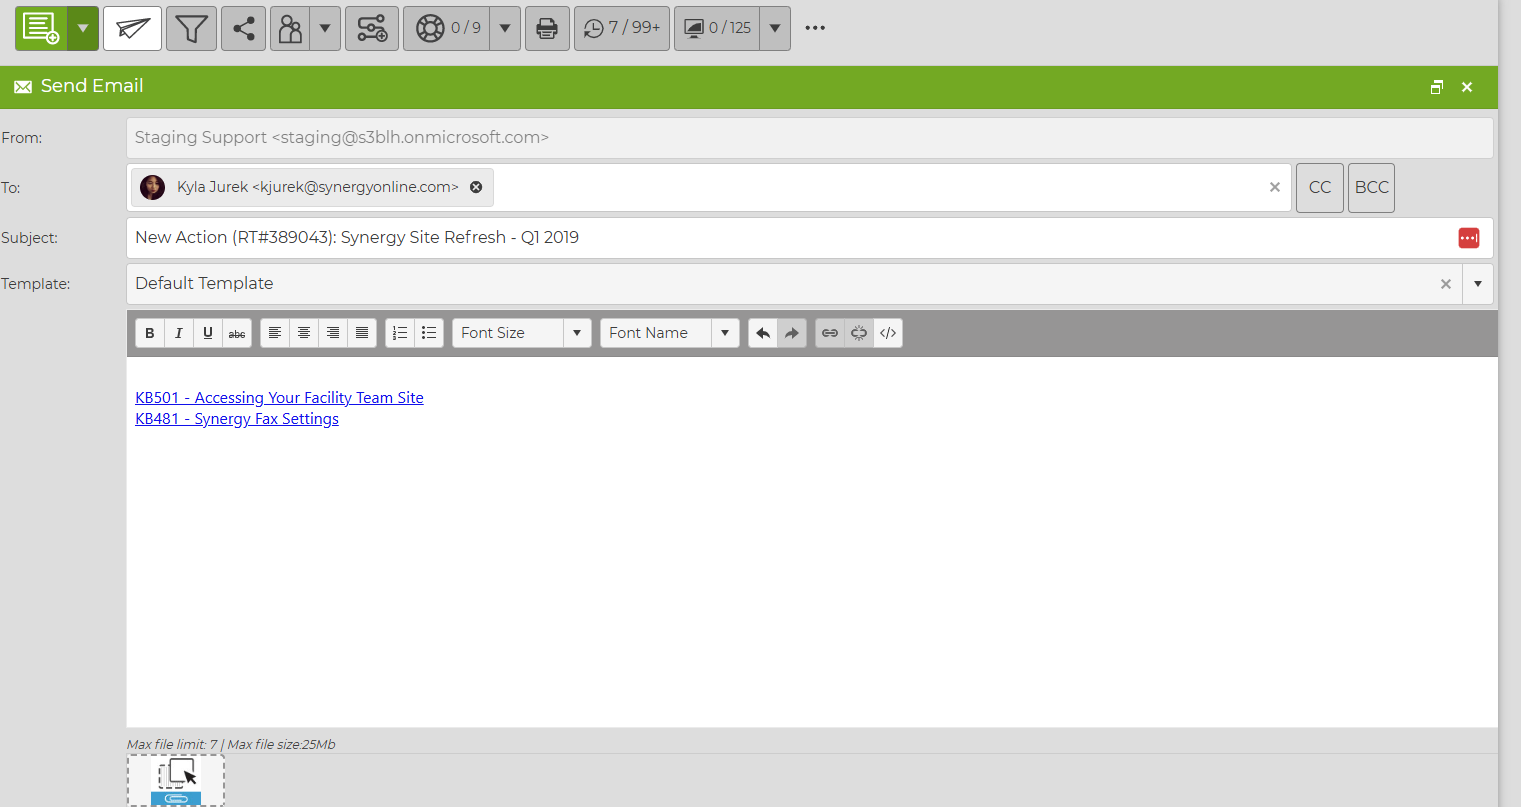
Knowledge Base articles can also be added by using the +KBase button at the bottom of the New Email section
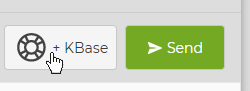
The Knowledge Base pop-up window will appear, allowing users to select the articles they need and then add them to the email draft.
Save and Close
If the action being added is the final action needed in the ticket, you can click the arrow next to the Save Action button and select Save and Close. This gives you the option to Save and Close the ticket in one step.
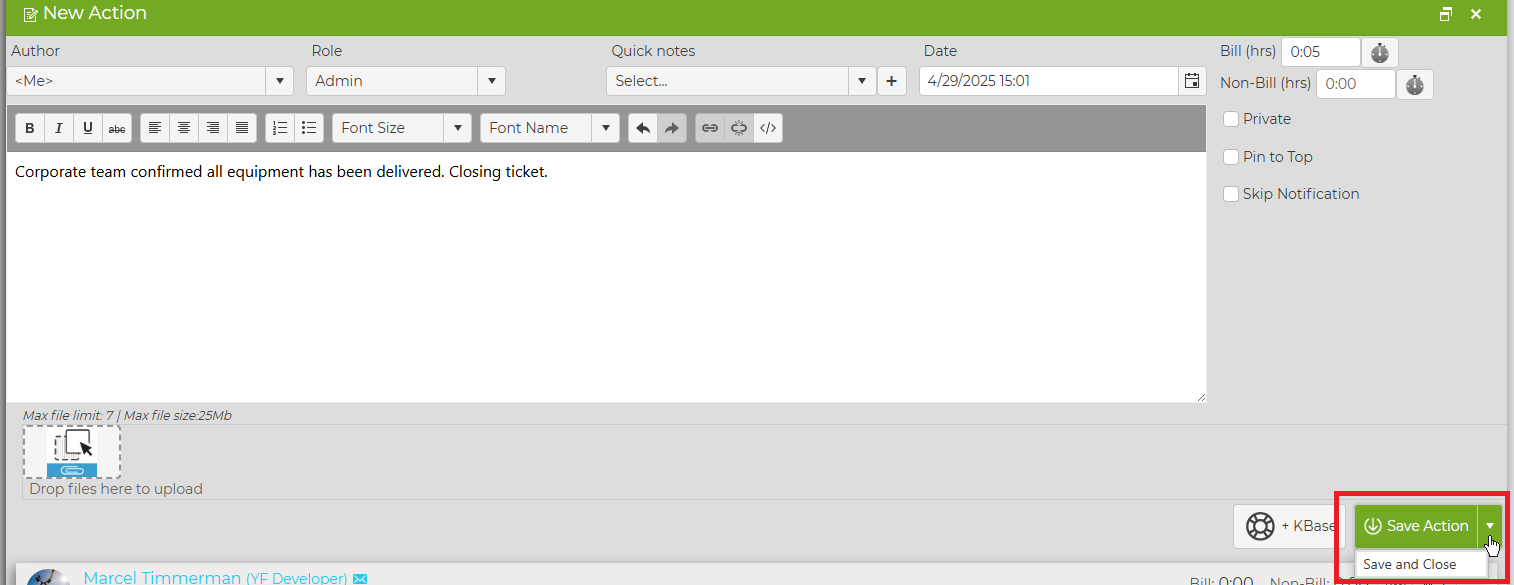
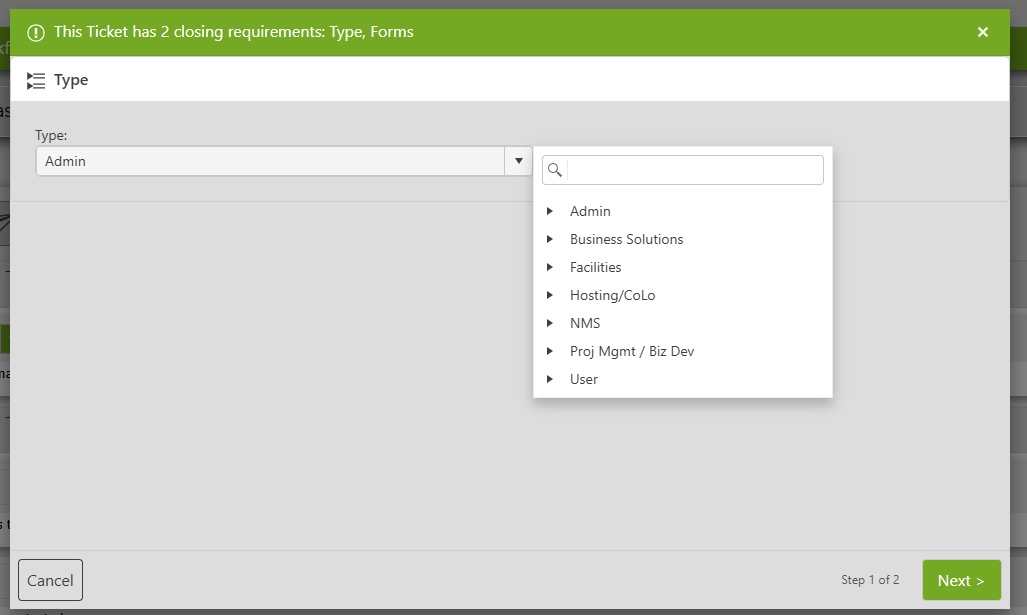
NOTE: If the ticket is missing information which is required before closing a ticket (i.e.: Ticket Type and Sub-Type), you will receive a warning from Revelation with the option to fill in the missing information. Once the information is updated, click on Save to Save and Close the ticket.
Delete an Action from a Ticket
If necessary, an existing action note can be deleted from a ticket. Simply click on the garbage can icon at the end of the note. A pop-up window will appear to confirm that you want to delete the action. Once confirmed, the note will be deleted.
NOTE: Deleting actions removes time against the user and the ticket. System notes cannot be deleted from a ticket.