When you click on the New Ticket, depending on the settings from your support company, you may see something similar to the following screens:
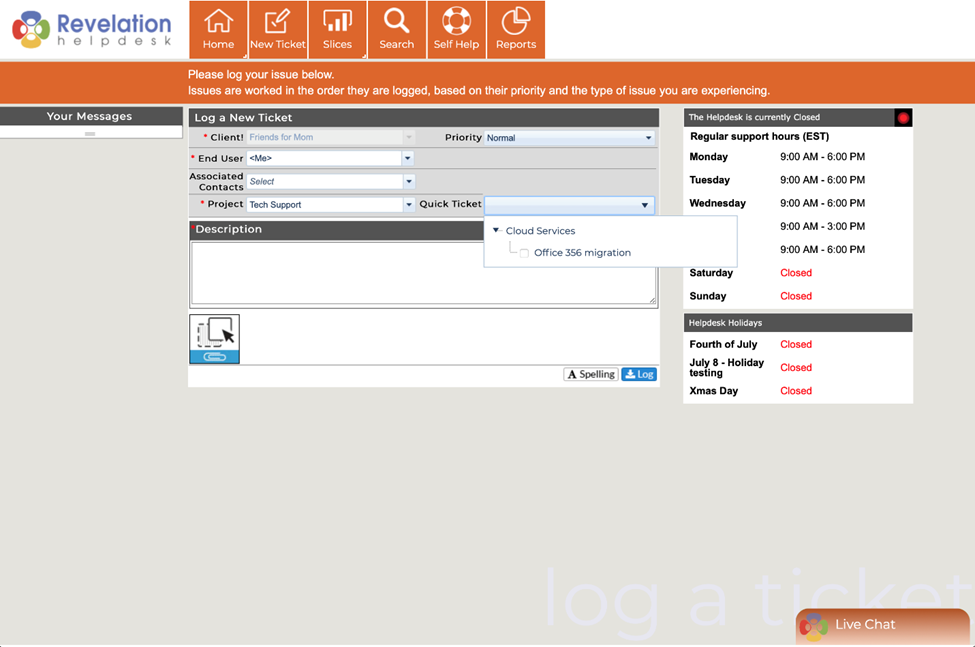
At the top of the screen are messages from your provider. On the right side, the regular support hours are shown. If there is a green dot at the top right, the help desk is open. If red, it is closed. Under the Support Hours is a list of the upcoming holidays when the help desk would be closed.
Note: Any item with a red asterisk (*) must be completed
|
*Customer |
Your company name will appear here. You will not be able to change this |
|
*End User |
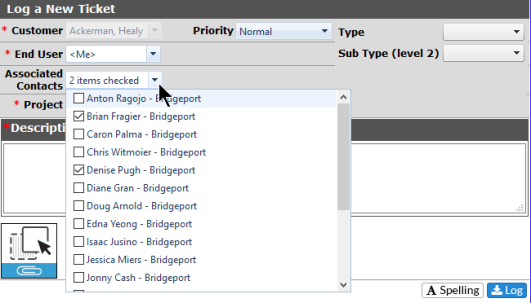
<<Me>> If you are an Administrator level user,you will also be able to select other users within your company. (As shown here) |
| Associated Contacts | If your provider has turned this feature on, you will be able to add additional, associated staff to the ticket. They will then see it on their home page, and be able to interact with it in the same way you can as the End User. |
|
*Project: |
Pull down menu of all projects you have with your provider. If you have only one project, such as a service retainer, there are no additional options available. |
|
Priority |
A drop down menu of priorities available for the ticket. If it affects multiple users, a higher priority should be selected. |
| Ticket Type/Sub Type | A drop down menu of Ticket Types available for the ticket. This feature may not be available on your system. |
|
Quick Ticket |
For recurring issues within your company. These are set by your provider. Simply use the pull down list to see if your issue is listed. Quick tickets that have been exposed to the Self Service Interface will now by automatically sub-categorized based on your existing Ticket Templates. This feature may not be available on your system. |
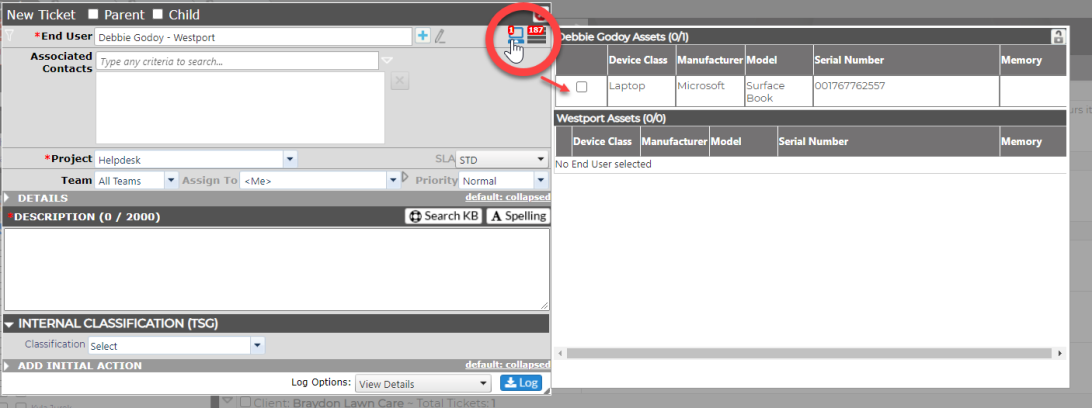
| Linked Assets | If your provider has turned this feature on, a computer icon will display in the top right of the new ticket. When clicked, a side menu will display Assets that are associated with your account will display with the option to log the ticket against that asset. Additionally, depending on your access level, you can click on the asset to display the asset information. |
|
*Description |
Describe the problem, including any error messages and specific equipment if necessary. Include a call back number if different from the usual contact number. |
|
Attach |
Attach a file by dragging the file over the icon or clicking on the paper clip to find the document, etc. The attachment will show as a paper clip icon in your ticket. This feature may not be available on your system. |
|
Check Spelling |
A spell check feature which may be enabled on your system |
|
Log |
Once all the information is added, hit Log. You will receive a message, with a call number, saying the call has been logged with your provider. |
If Associated Contacts is turned on, you can select other users to add to your ticket from a drop down. They will be able to see and interact with the ticket from their home page.
If Linked Assets is turned on, a computer icon will display in the top right of the new ticket. When clicked, a side menu will display Assets that are associated with your account will display with the option to log the ticket against that asset.
Once you complete the form, click on the Log button in the lower right corner. You may then see the following screen with the ticket number, your response time, and when work will start on the ticket.
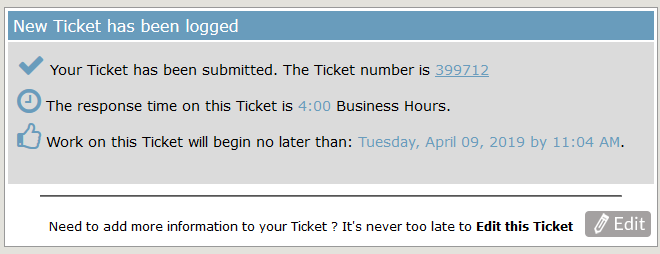
Or you may see something similar to this:
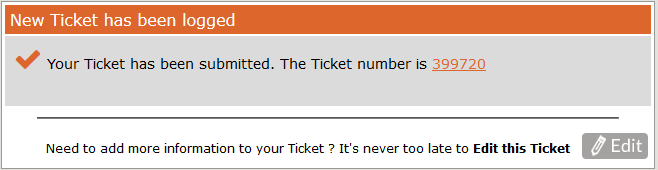
If you feel you need to edit the ticket, click on the Edit button in the lower right corner. It will take you back into the ticket where you can add an Action Note to further explain the issue.
If, when you go to log the ticket, the helpdesk is closed, you may see the following message:
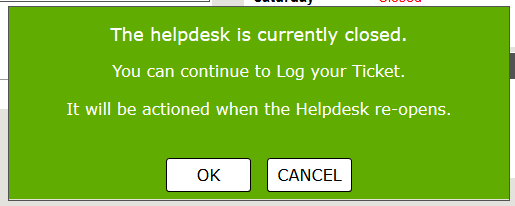
You can click OK to log the ticket or click Cancel to wait until the helpdesk is open the next business day.