Adding Saved Search Results to Ticket Monitor
Revelation allows you to save searches you run regularly.
NOTE: This feature is available to Managers and Administrators only.
Set up the search as you normally would by selecting the appropriate search and options. Select Save under the Current Filters section of the Search Screen.

You will be redirected to a screen to save the search name for future use.
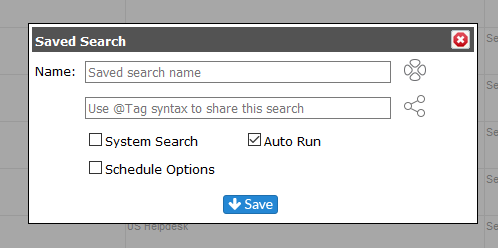
System Search: Turns your Saved Search into a System Search
Schedule Option: If you want the search run on a regular basis, such as open tickets against a particular client, check View Scheduling Options to schedule delivery of the Saved Search.
Auto Run: When checked, runs the search as is. If unchecked, the Saved Search doesn't run immediately, but allows you to change search parameters before running.
Once the search is saved, it will show on the Saved tab in Search. To run the report, click on the magnifying glass next to the report name in the Run column. The search will run through Revelation and display on the screen.

To sort or group Saved Searches, right click on the Title bar. You will be able to Sort Ascending/Descending, Group or Ungroup and select the columns visible on the page.
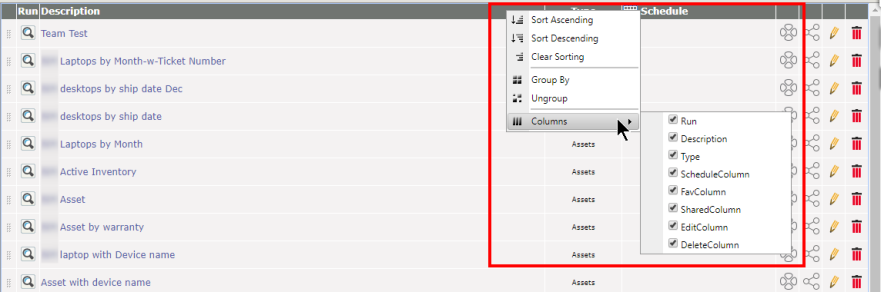
Edit Saved Searches
To edit a saved search, run the search by clicking on the Run button. Make the adjustments you need by adding/removing/updating the filters on the left side of the screen, then click the Refresh button under the new filter set.
Once the search has run, if it is something you wish to save as a new saved search, click on the save button. You will see the following dialogue box:
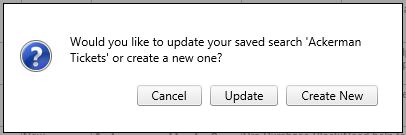
Cancel - Won't save the changes
Update - Updates the existing saved search
Create New - Creates a new saved search. The dialogue box will come up to name your new search, add it as a system search and/or set up a schedule to run the search.
Adding Saved Search Results to Ticket Monitor
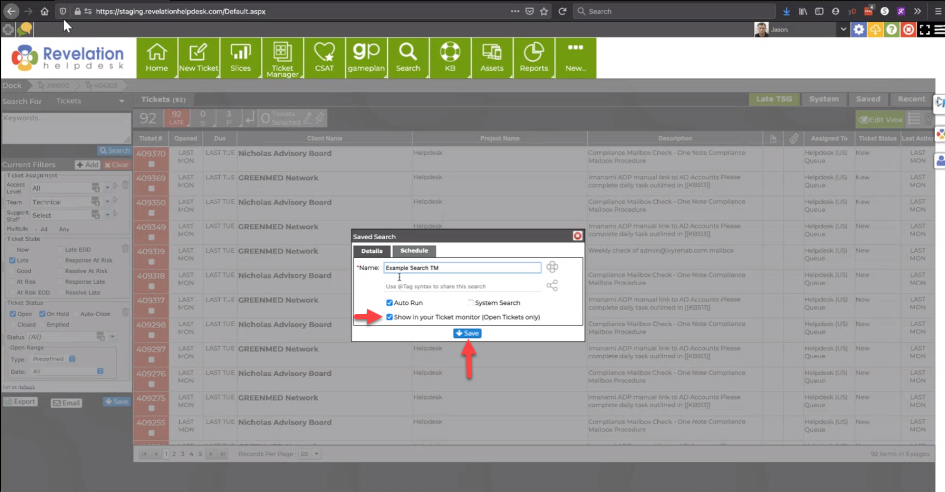
When saving a Ticket Search, as long as it has open tickets in the result, you have the option to add it to the Ticket Monitor.
Name your Saved Search, click the Show in your Ticket Monitor (Open Tickets only) box when saving your search. Then click Save.
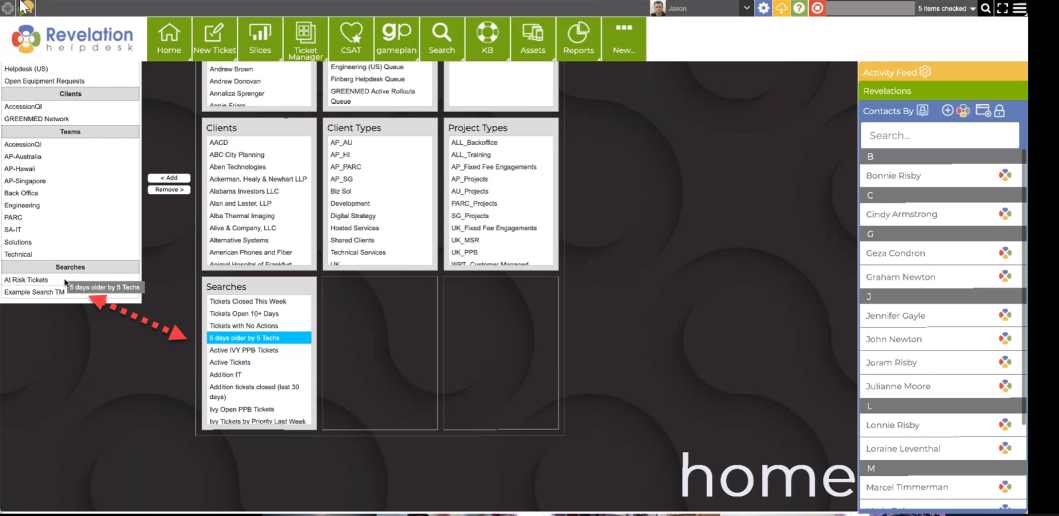
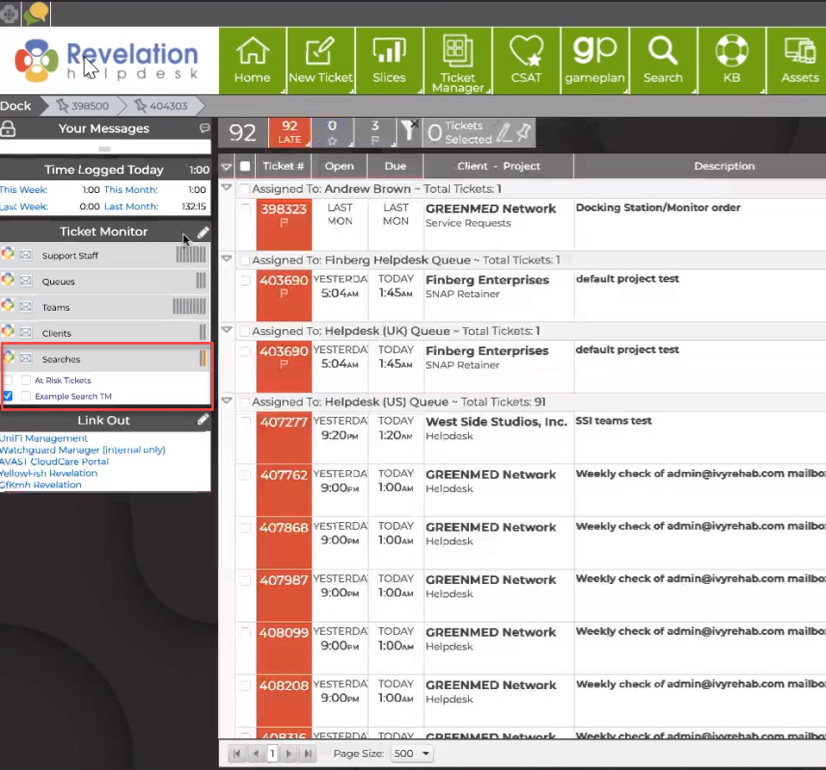
When returning to the Homepage, under Ticket Monitor, a Searches category will appear with your saved search.
This will allow you to overlay this saved Search with any other group within your Ticket monitor, to display on your homepage.
NOTE: There will be a slight delay (between 3-5 minutes) while the Search renders its results.
To add or remove any saved Searches from your Ticket Monitor, click on the Ticket Monitor editing icon.
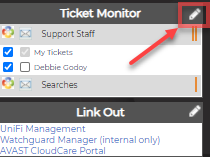
The saved Searches will be listed to add or remove from the Ticket Monitor. Select Add or Remove, or click & drag the Search into the Ticket Monitor.