Add a new non-recurring Workflow
From this section, Admins and Super Admins can add or edit existing Workflows.
Select a Workflow Template
Open the Workflow Type drop-down menu at the top of the window and select the appropriate Type. Once selected, Revelation will show a list of all existing Workflow templates.
Add a new non-recurring Workflow
- Open the Manage Workflows tab from the Workflow menu on the left.
- Select the Workflow Type from the Workflow Type Selection drop-down menu. Once a type is selected, a list of existing workflows for that Type will appear.
- Click on the New button just under the Workflow Templates header.
|
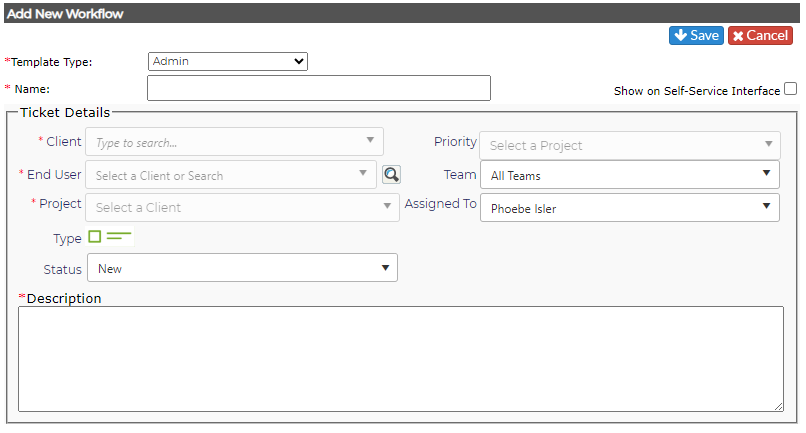
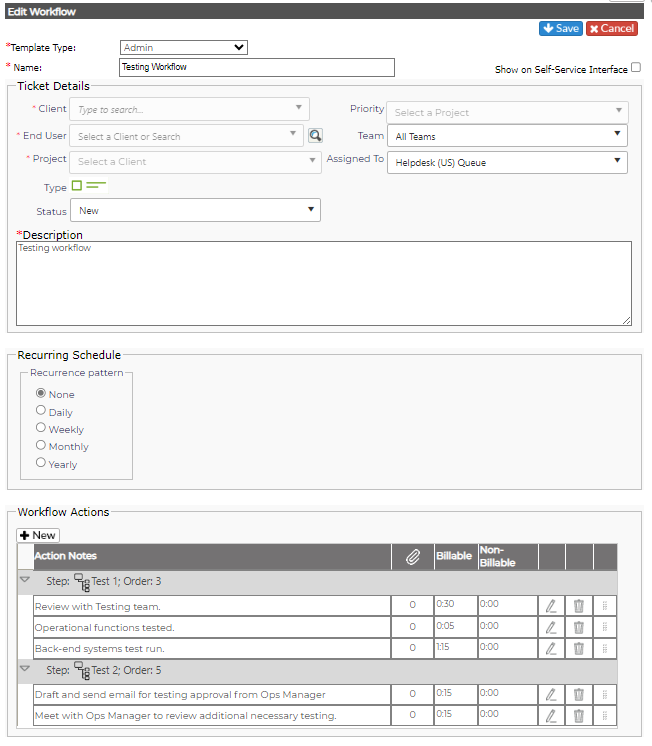
Another screen appears for creation of the workflow:
Note: if at any point you designate a Queue to a step, the system will use the original Ticket Logger as the default for system driven actions
|
|
|
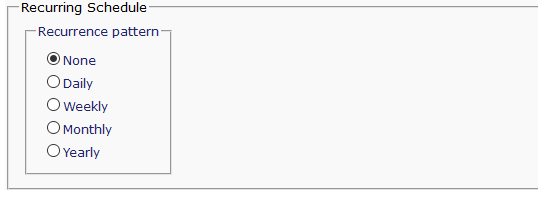
Leave the selection under Recurring schedule at None |
|
|
Once these items are filled in, click Save. You will be able to add Actions and assign them as needed to staff. |
|
|
|
|
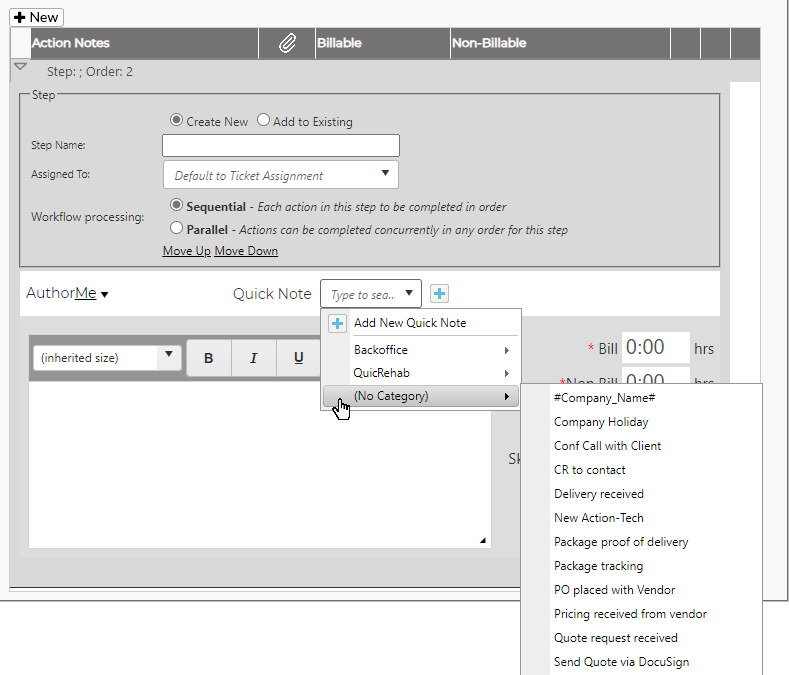
To add an Action using a Quick Note:
The Quick Note will be added as a new action note for the Workflow, including any status changes, reassignments and time. NOTE: If a Quick Note is deleted from the system, it will be removed from the Workflow. |
|
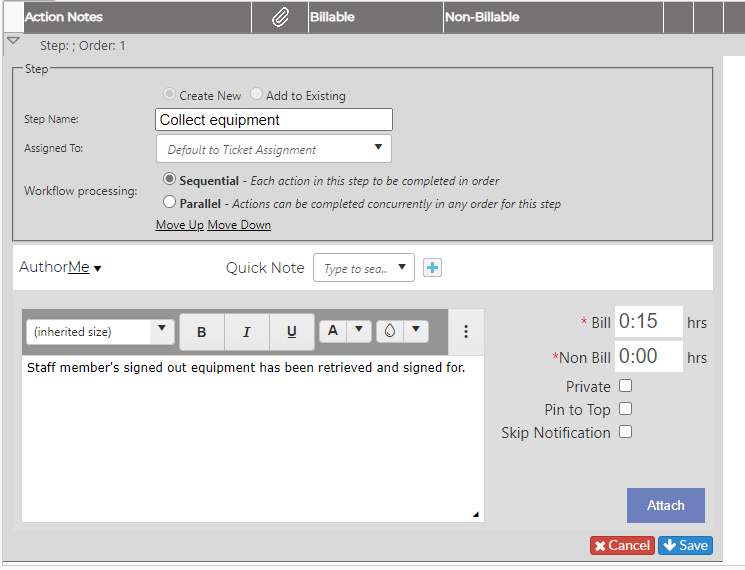
When you have completed all the steps, click on the Save icon to retain the Workflow or the Cancel icon to discard.
Add a Recurring Workflow
To create a recurring Workflow, follow the steps above EXCEPT for the following items:
-
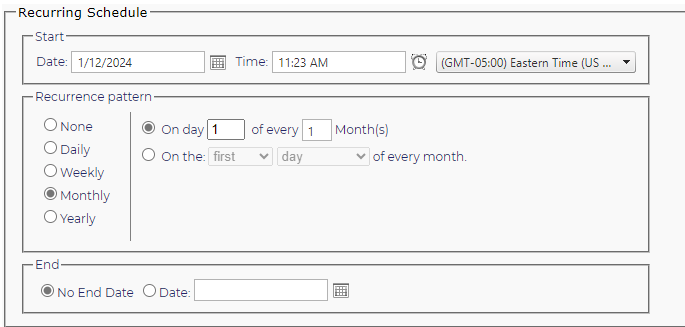
Under Recurring schedule - select the frequency - Daily, Weekly, Monthly or Yearly
-
-
A scheduling screen will show based on your selection
-
Set the time at the top for the ticket to log to the system
-
If Daily - it will log every day at that time
-
If Weekly - select the day(s) for the ticket to log every week
-
If Monthly - set the day of the month the ticket will log. The default is the 1st of the month.
-
If Yearly - set the month and day for the ticket to log
-
-
Set the start date for the tickets to begin logging.
-
Set the End Date if required. If not, leave the No End Date radio button selected
-
Click the Save icon at the top of the page and the tickets will start logging at the appropriate time.
Edit a Workflow
Select the type of Workflow and then, in the list shown under Workflow Template, click on the pencil icon to the right of the workflow you wish to edit.
Reorder Workflow Actions
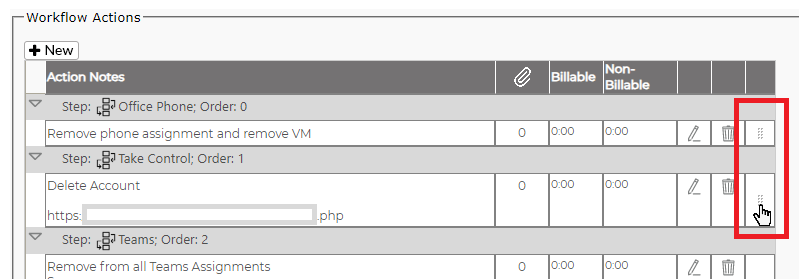
Select the Workflow as from Edit a Workflow (above). Under Workflow Actions, click on the dots in the last column next to the action you wish to move, and drag the action to the correct location. When you have completed moving the actions as needed, click Save at the top right corner of the Edit Workflow screen to keep your changes. Click Cancel if you don't want to keep the changes.
Delete a Workflow
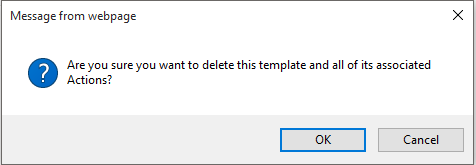
Select the type of workflow and then, in the list shown under Workflow Templates, click on the trash can icon to the right of the workflow you wish to delete. You will see the following warning message: