
NOTE: This will only be available if Asset Management is active within your copy of Revelation. This feature is not available for Core users.
Logging a Ticket with an Associated Asset
Adding an Asset Classification
Logging a Ticket with an Associated Asset
While logging a new ticket, you can add any assets associated with the user if they are in the system.
Click on the Asset tab on the lefthand side of the ticket menu - the number of assets available for assigning will appear in the green notification box. When the list of assets appears, select the relevant asset for assignment - the asset will be assigned to the ticket once the user finishes logging it.
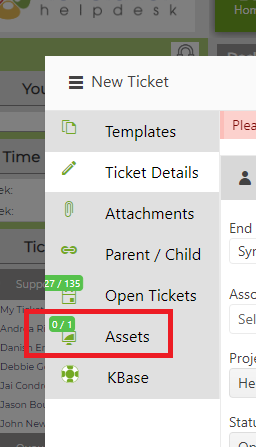

End users can have multiple assets assigned to them.
Available Assets
Within a logged ticket, you have the ability to view the Available Assets associated with the Office location (Office Assets) or all of the company's assets within the system's database (All Client Assets).
Select the arrow next to the computer icon, as shown below, to assign an asset to the user.

Select Add Asset. The Available Assets screen will appear in a pop-up window on your screen.
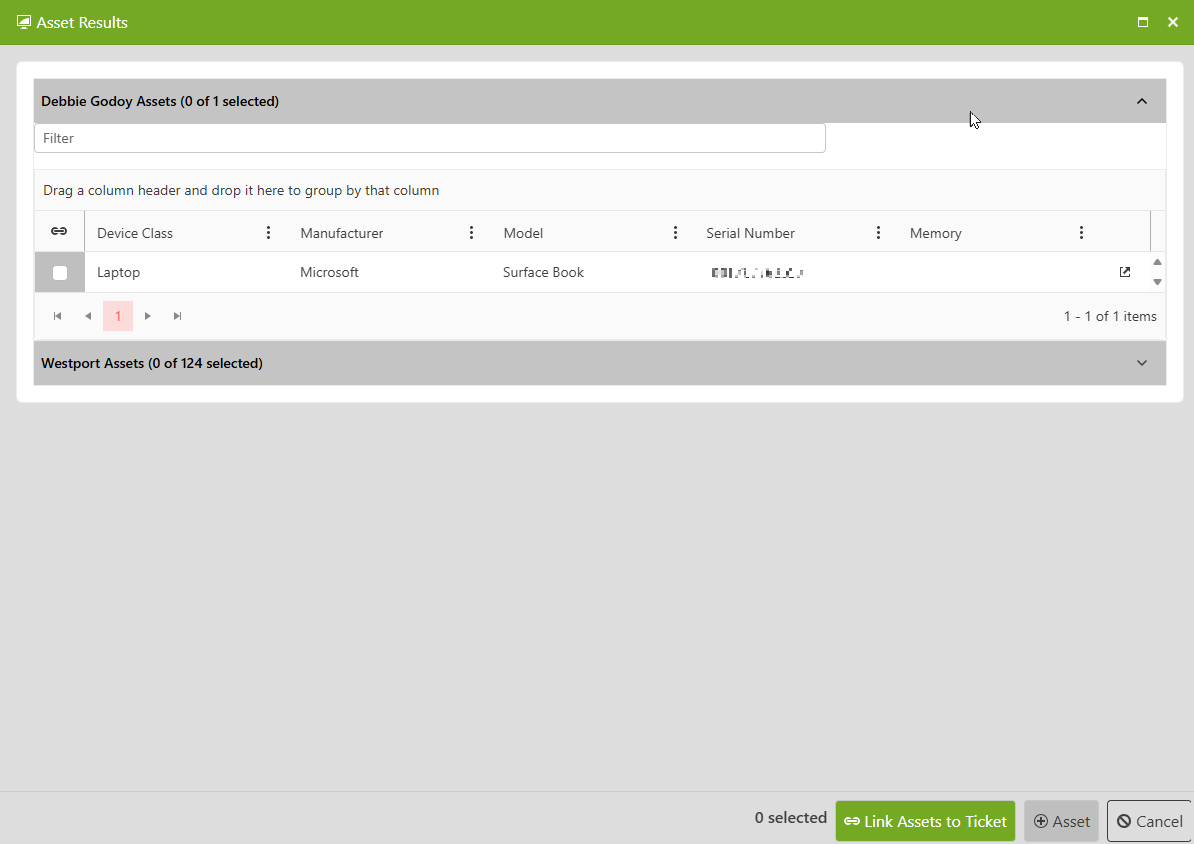
From there, you have the ability to view End User Assets (assets assigned to the ticket's End User); or All Client Assets (all assets assigned to the client, regardless of location - if there are ones available). Assets can be searched by keyword - users can choose which set of assets to search by selecting the appropriate check box next to the asset's information.
Assets by End User
Assets by Client
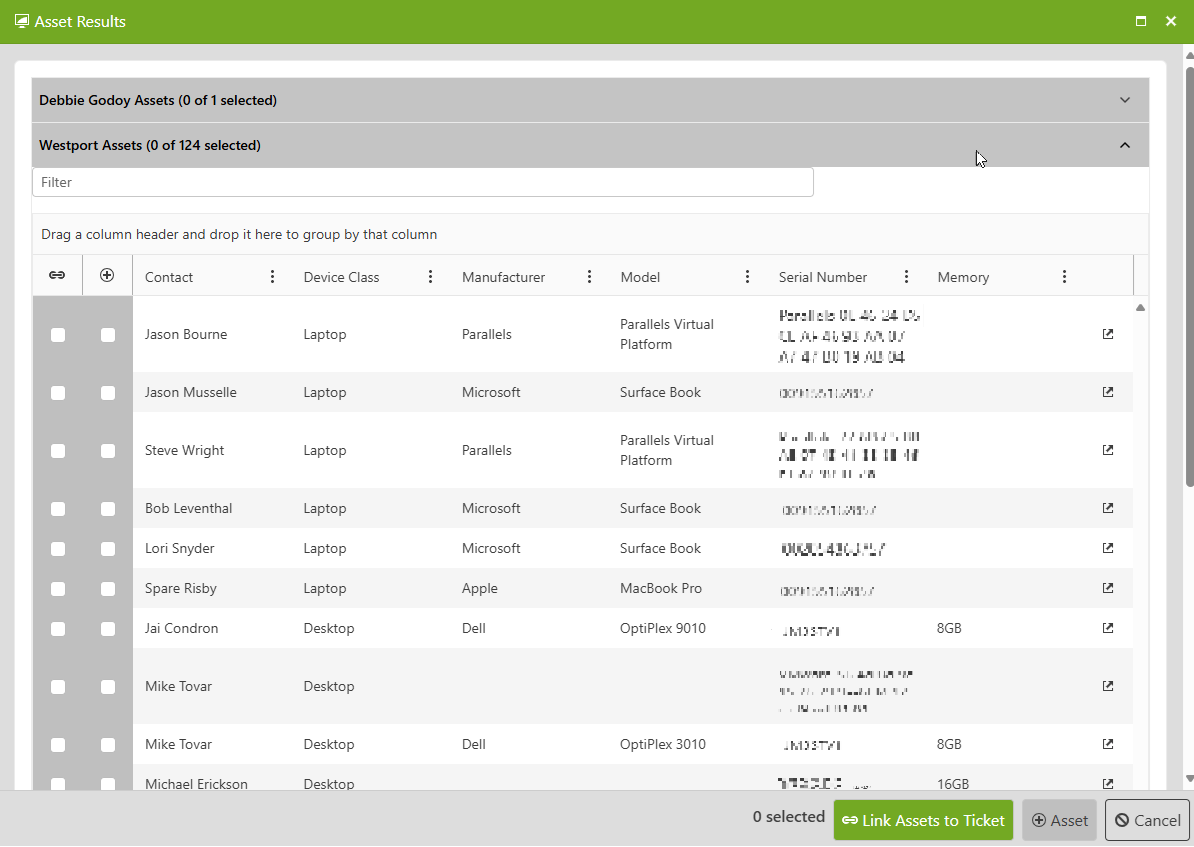
Once you have selected the assets you want associated with the ticket, click Link Assets to Ticket. The Asset button will update accordingly.

NOTE: To remove an asset, unselect the check box next to the item and click Link Assets to Ticket. This will remove the asset.
Edit an Asset
Users with granted permissions can edit assets directly from the Assets screen. To view and edit an asset, select the pop-out icon to the far right of the asset listing.

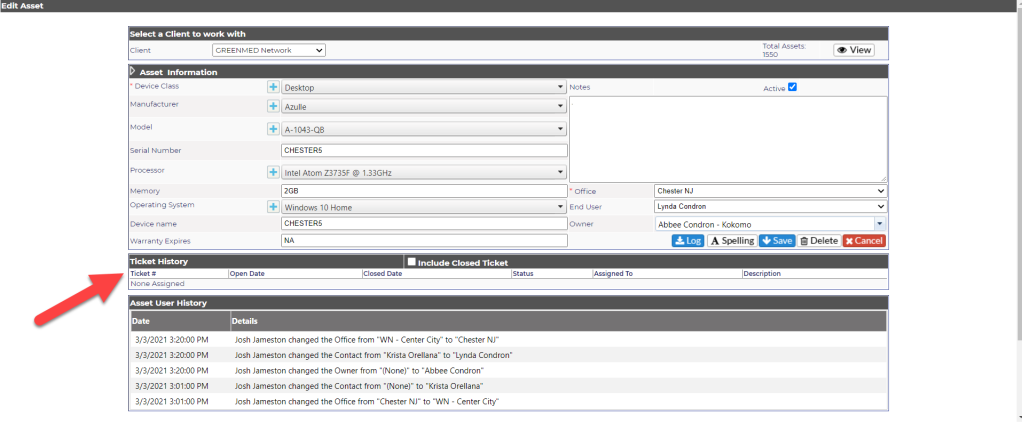
The Edit Asset screen will open in a new tab. It will display the Asset Information - any notes, the Office, the End User, and the Owner of the Asset.
Note: To safeguard assets from being assigned to an inactive end user, thus removing the ability to log tickets against the asset, it is highly advised to consider assigning an Owner to the asset if you have multiple office locations and end users. This way, it will allow the asset to remain fixed on a consistent owner in the event that the End User is no longer active.
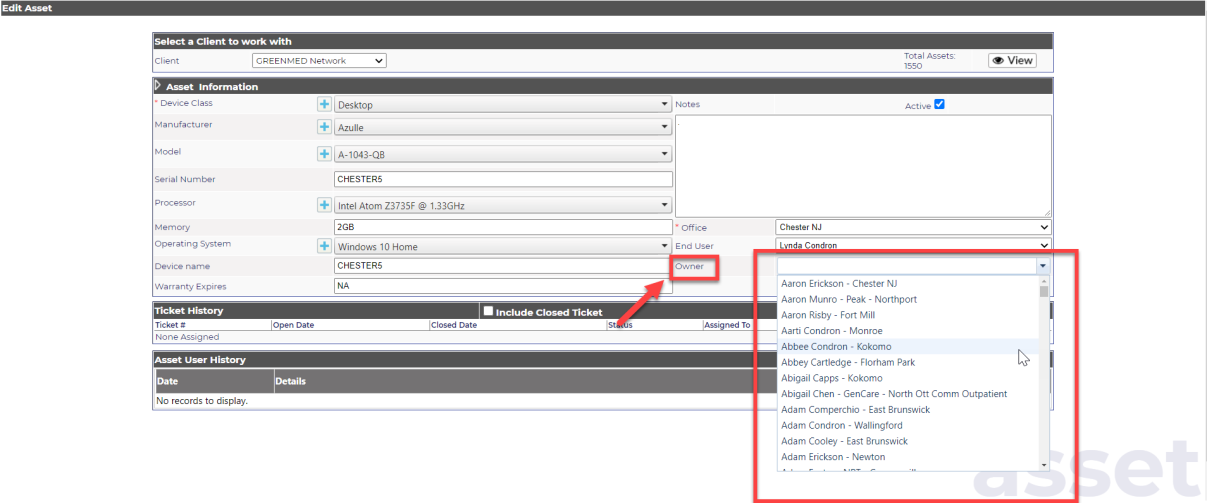
Below the Asset Information, a Ticket history will display any tickets logged against the asset
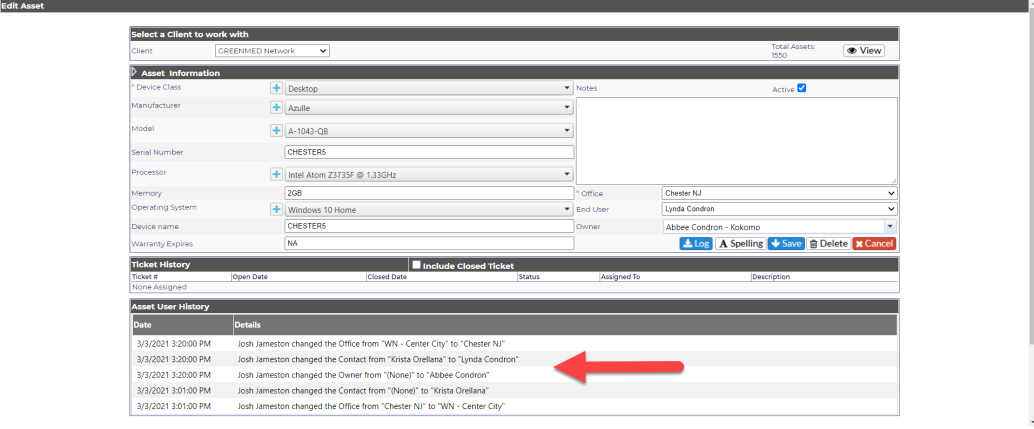
The Asset User History will display the date, time and details if the asset has been reallocated to a new end user.
Adding an Asset Classification
NOTE: This feature is tied to User Permissions and is on by default for all support staff user levels except Staff Plus. Please visit the Permissions section of the Help Guide for further information, or by clicking here.
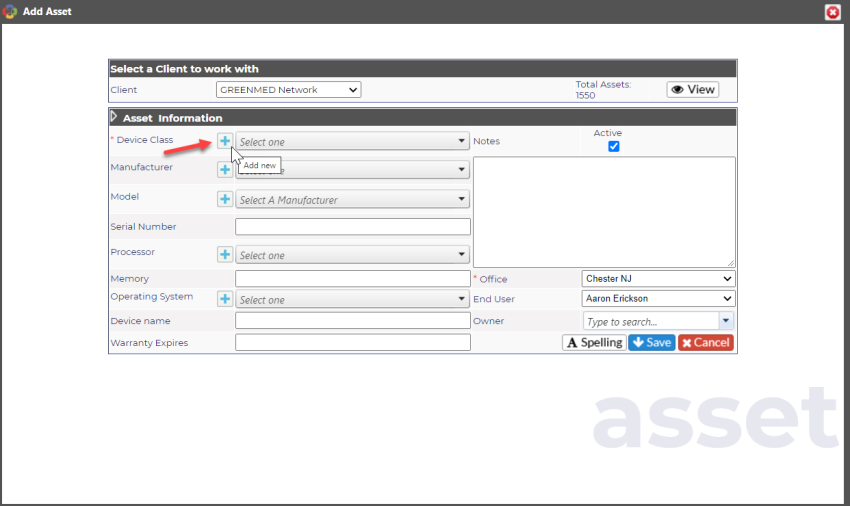
You can add an Asset classification while editing an Asset through a ticket by clicking the + icon next to the category drop down.
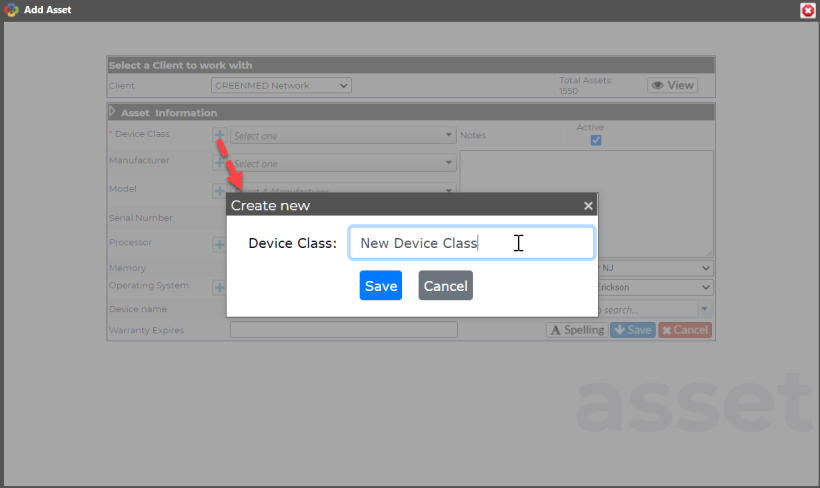
You will be prompted to create a new classification within that Module. Click Save.
That classification will now be added to the Module for future use.
Bulk Log Asset Tickets
If you need to log multiple tickets on a particular type of asset, i.e. firewall warranty expirations, you can do this via the Bulk Log function in Assets or Search.