
File (.xls, .xlsx, .csv, or .xml)
Please note: the Import Manager is a technical feature of Revelation helpdesk. Any Imports done using this wizard cannot be undone. Be sure read all the instructions before proceeding with your Import.
Based on the relational nature of the import, you may be required to do multiple imports to bring in all the information from your database. Clients must be imported before Locations, and Locations before Users (either internal or external) or Assets
NOTE: Imports cannot be done all at once. They must be done in a specific order:
-
Asset - This is only available if Asset Manager is enabled.
You must import Clients before Locations, and Locations before Users and Assets. If any of the items exist in Revelation already, you may skip to the import that is needed. For example, if the Clients and Locations already exist in Revelation and there are Users to be added, you only need to import the Users PROVIDED the Client name and Locations match exactly with those items already existing in Revelation.
If you are using the Excel Import file available on Revelation, populate the tabs with the information you want to import, making sure you include all the required fields for each section. Save the file once completed.
To begin the import:
On the Import Manager page, click on the New button to begin the import.
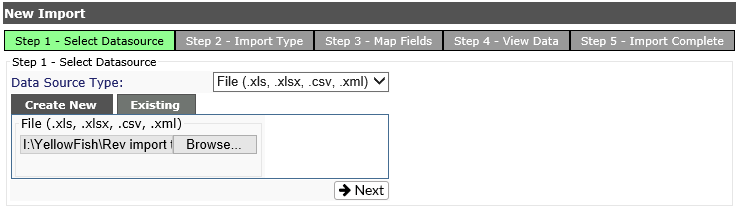
You will see the New Import view.
From the drop down at the top, select the format of your Data Source. It will be one of three options:
File (.xls, .xlsx, .csv, or .xml)
-
Click on the Browse button to find your data source, then click on Next.
Web Service
-
Select the Web Service Path
-
The Authenticate check box is unchecked by default
-
-
If your webservice requires authentication, check the box and you will be required to enter your username and password as shown below.
-
-
Click on the green arrow by Authenticate to connect to the Web Service and retrieve the entity names.
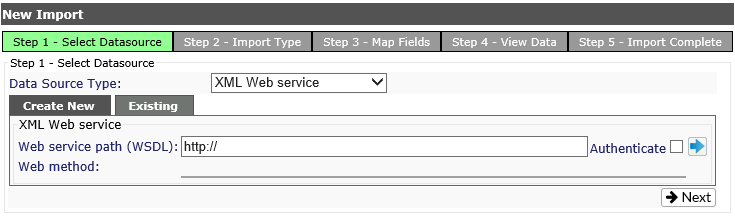
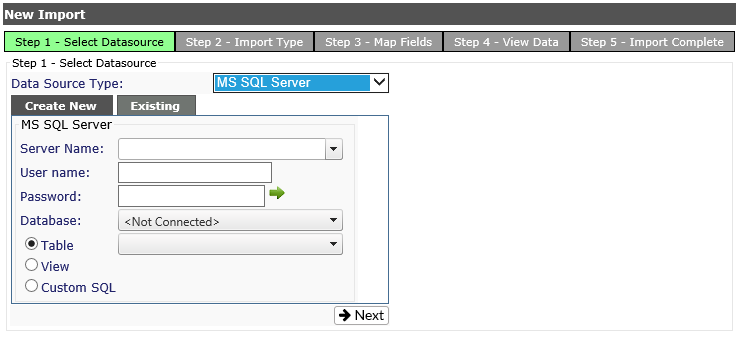
MS SQL Server
-
Select the Server name
-
Enter your SQL User Name (Windows authentication is not supported.)
-
Enter your Password
-
Click on the green arrow by Password to connect to the data source and retrieve the database names.
-
Select the Database Name
-
-
Table - a table in the database
-
View - a view in the database
-
Custom SQL - enter a custom SQL Query (example shown below).
-
Choose the type of import and the record set, if applicable, on the data source for the import.
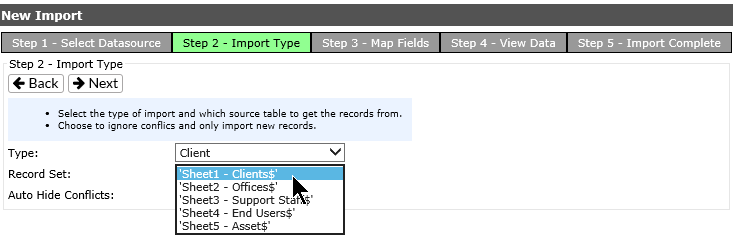
NOTE: Imports must be done in a specific order - Clients, then Locations, then Users or Assets. If the client information exists in Revelation already, you can move to Locations. If Client and Locations exist, you can start with Users. However, you cannot do Locations then Clients.
If Auto Hide Conflicts is checked, only new records will be imported and conflicts will be ignored.
When the options are set, click on Next at the top of the page to Map the fields.
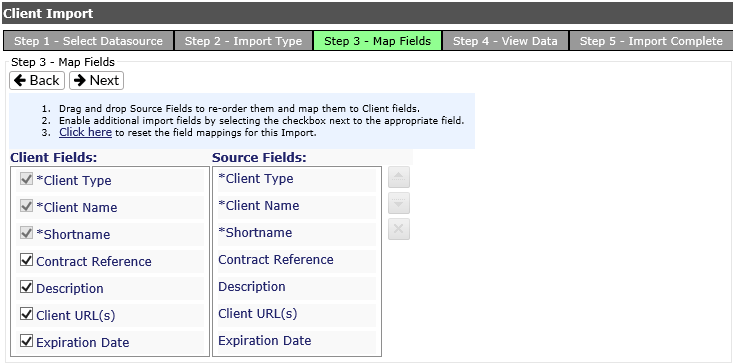
-
If you use the format from the imported spreadsheet, the fields will automatically map.
-
Fields with an asterisk (*) are required.
-
Additional fields can be added by selecting the check box next to the field. If not checked, the field will not be imported.
-
You must rearrange your source fields to be on the same line as the Client Field by using the up and down arrows to the right of the box or by drag and dropping them in the correct order.
When you have completed these steps, click Next at the top of the page to View your data.
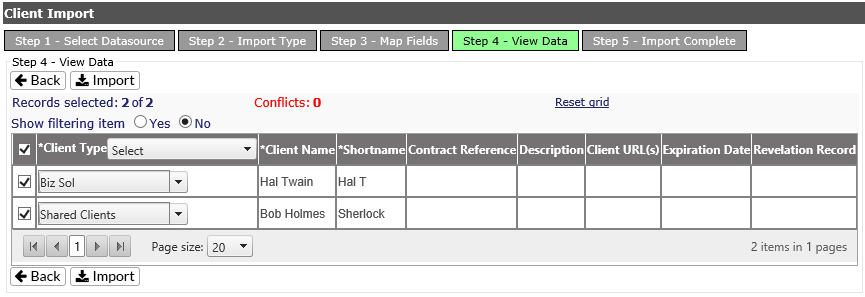
If the information looks correct, click Import.
The Import Manager will show you how many records were created and if there were any conflicts. If you're happy with the information, click on the Import button at the bottom of the grid to complete the procedure.
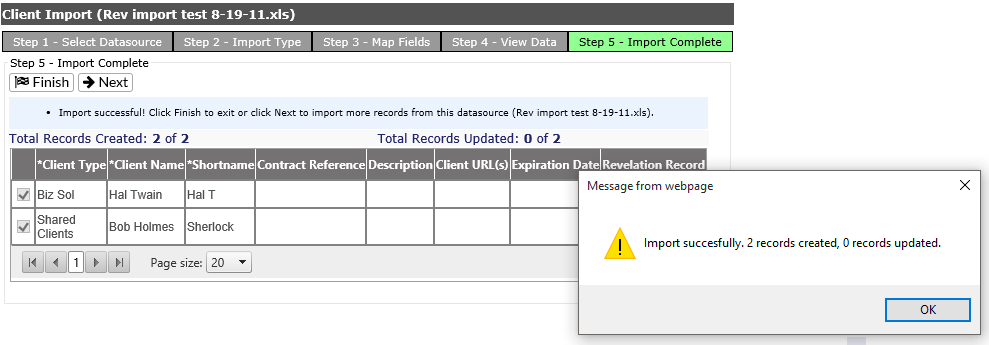
You will get a confirmation of a successful import with the number of records created.
NOTE: If the import was to add Locations, Users or Assets to existing Clients, you will get a message including the number of records updated rather than created.