Tabs
The Revelation 365 app can create tabs within any Teams channel, allowing users to view a customized, filtered list of tickets without leaving Microsoft Teams.
NOTE: Upon installation, a "My Tickets" tab will automatically be added to your Revelation app by default, which displays your personal open tickets.
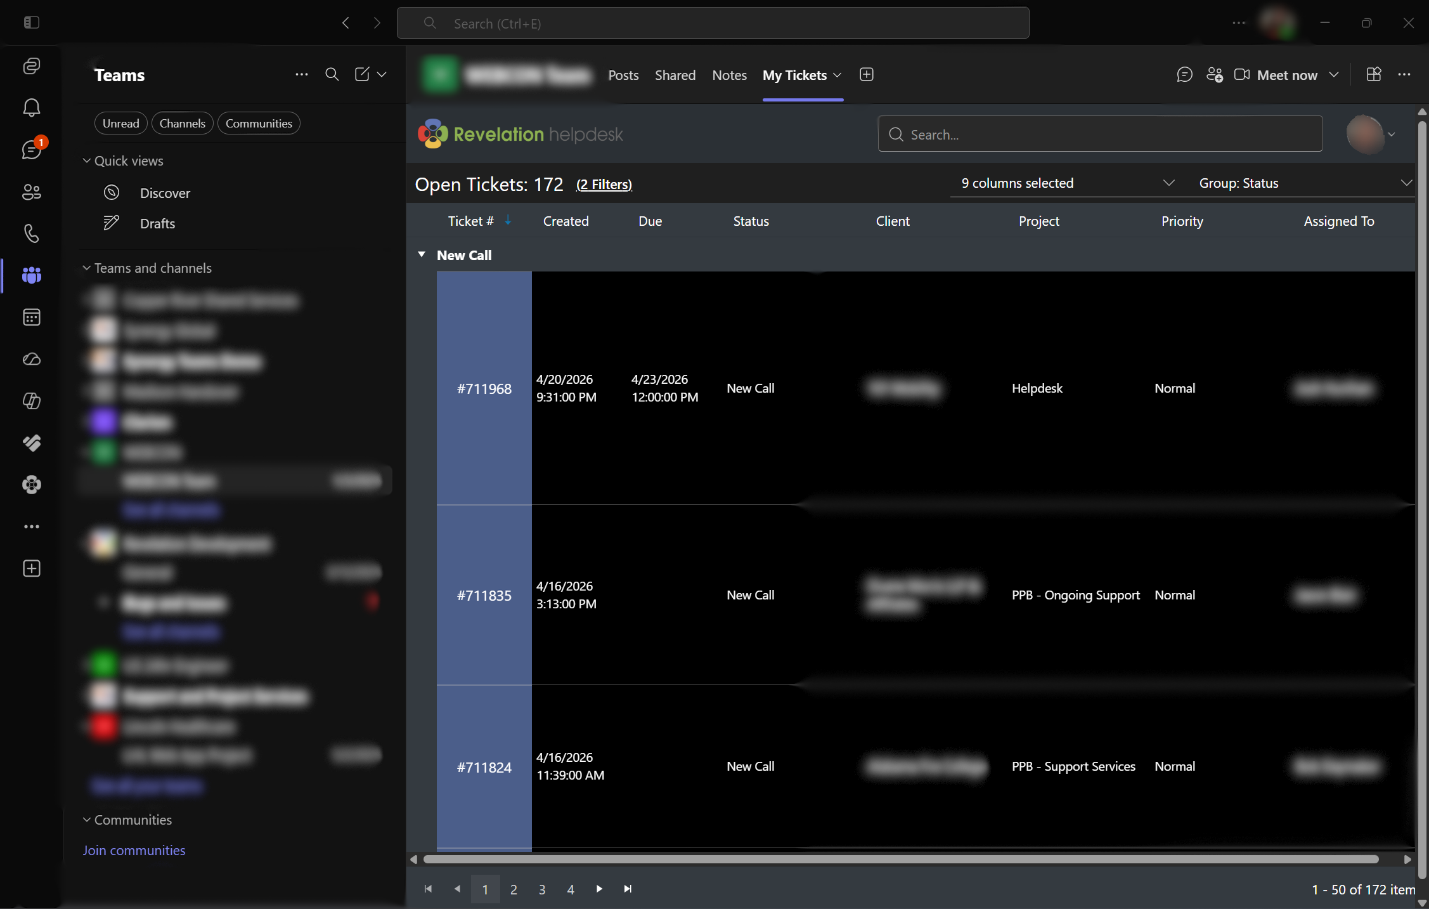
To set up a filtered ticket view:
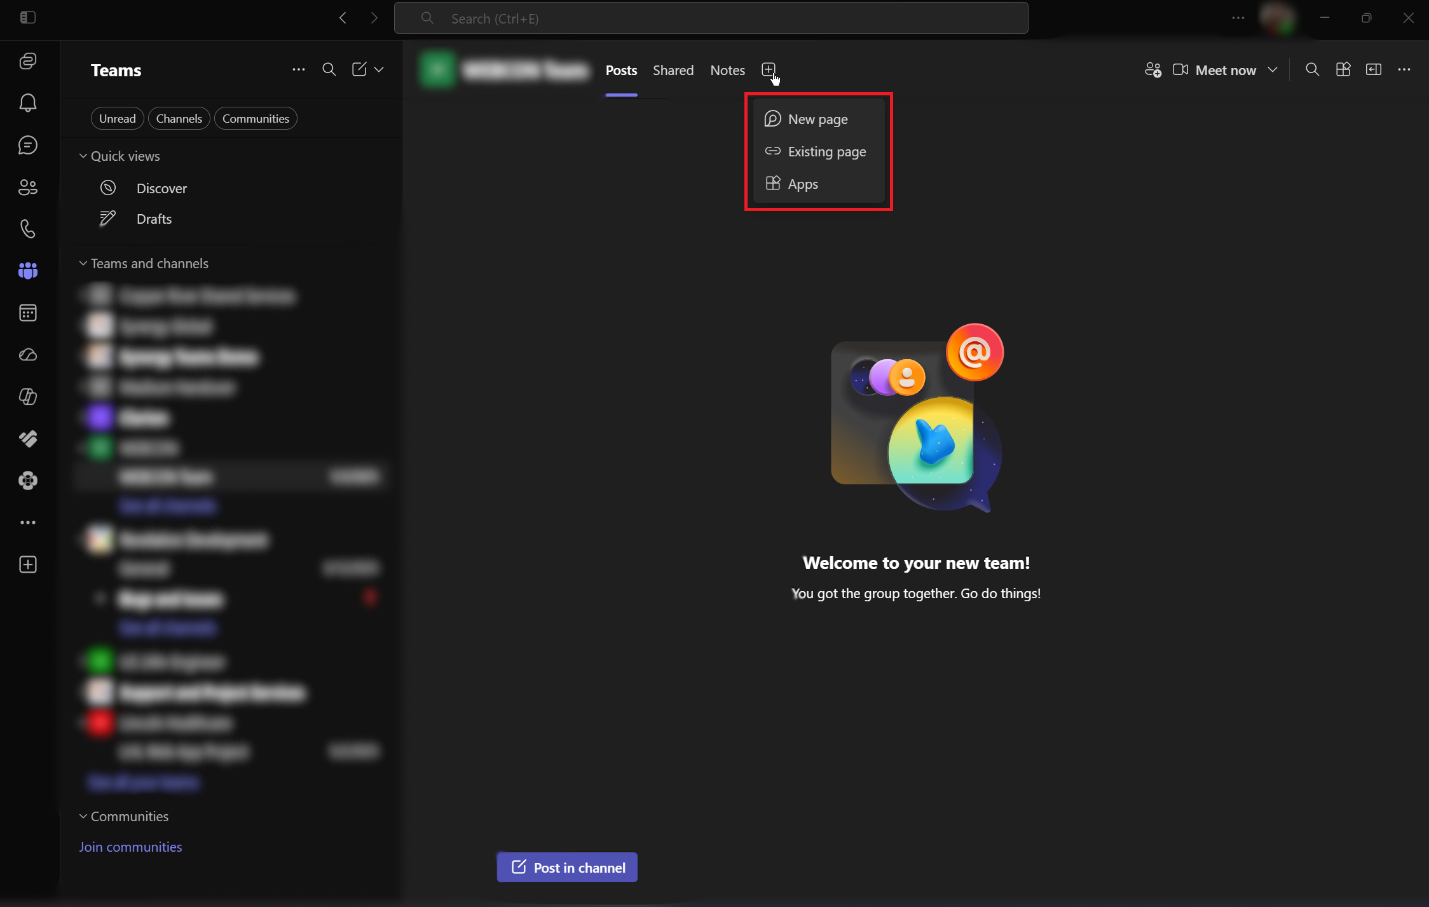
1.) Click on the add tab button at the top of any Teams channel and select Apps.
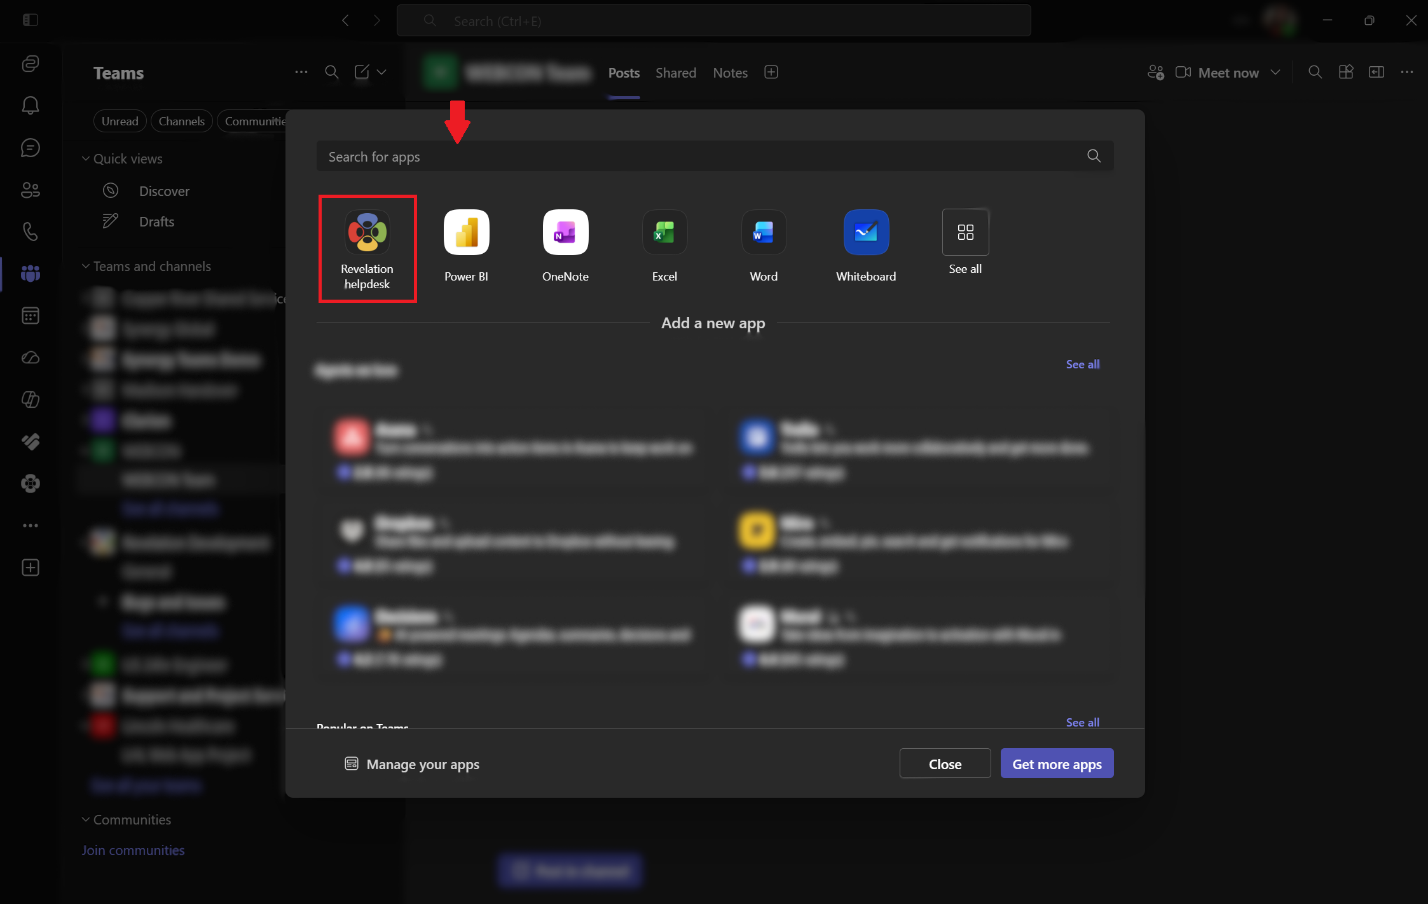
2.) Use the search bar to search for Revelation helpdesk or select it from your available apps. If prompted to sign in, follow the necessary steps to do so.
3.) Create a name for your new Tab in the Open Tickets pop-up field, then select what type of Tab you would like to create: Personal (“My Tickets”) or Scope-Specific (tickets filtered by Client/Project/Team/etc).
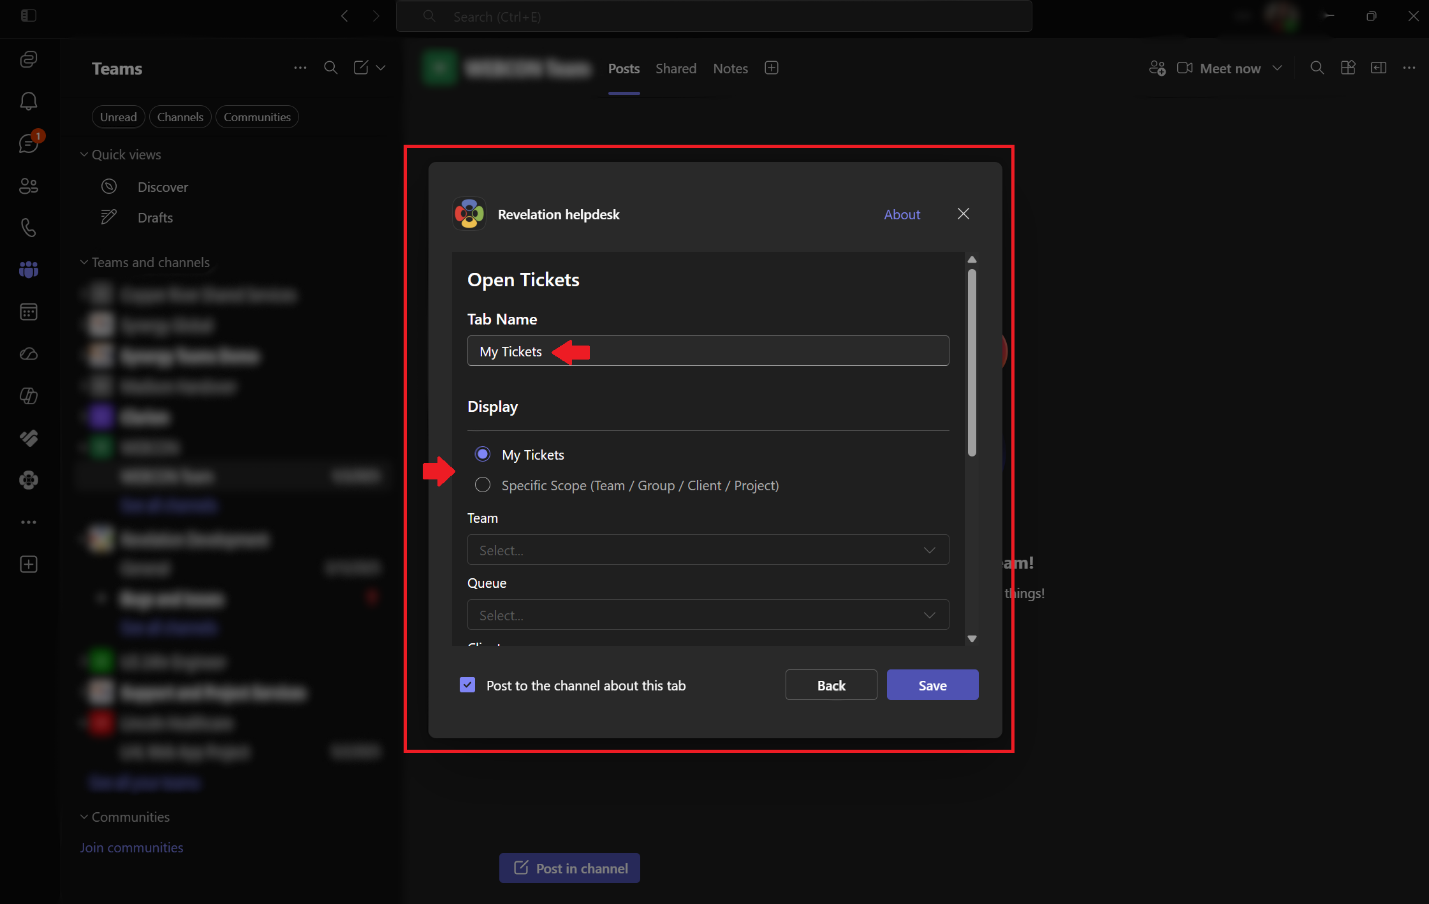
4.) If you select Specific Scope, the ticket viewing and filtering options will become active. To customize what tickets you are viewing, use the available fields:
View tickets:
- by Teams
- by Queues
- by Clients
- by Projects
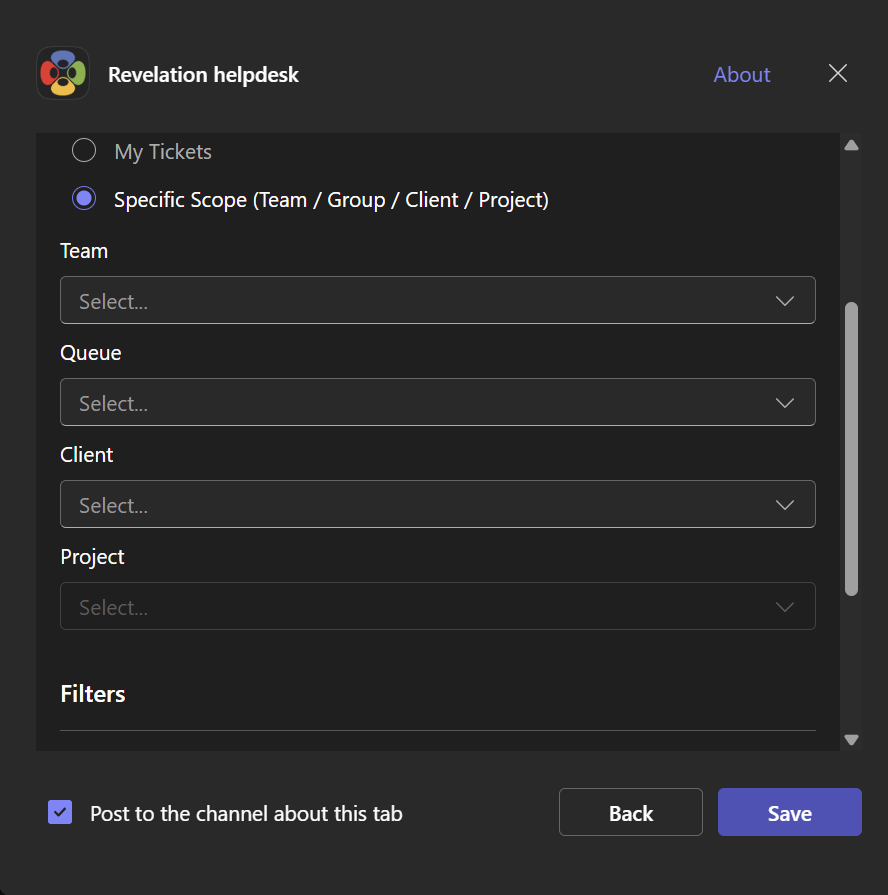
NOTE: The Project field becomes available once you select a specific client.
To customize how these tickets are filtered, use the available fields:
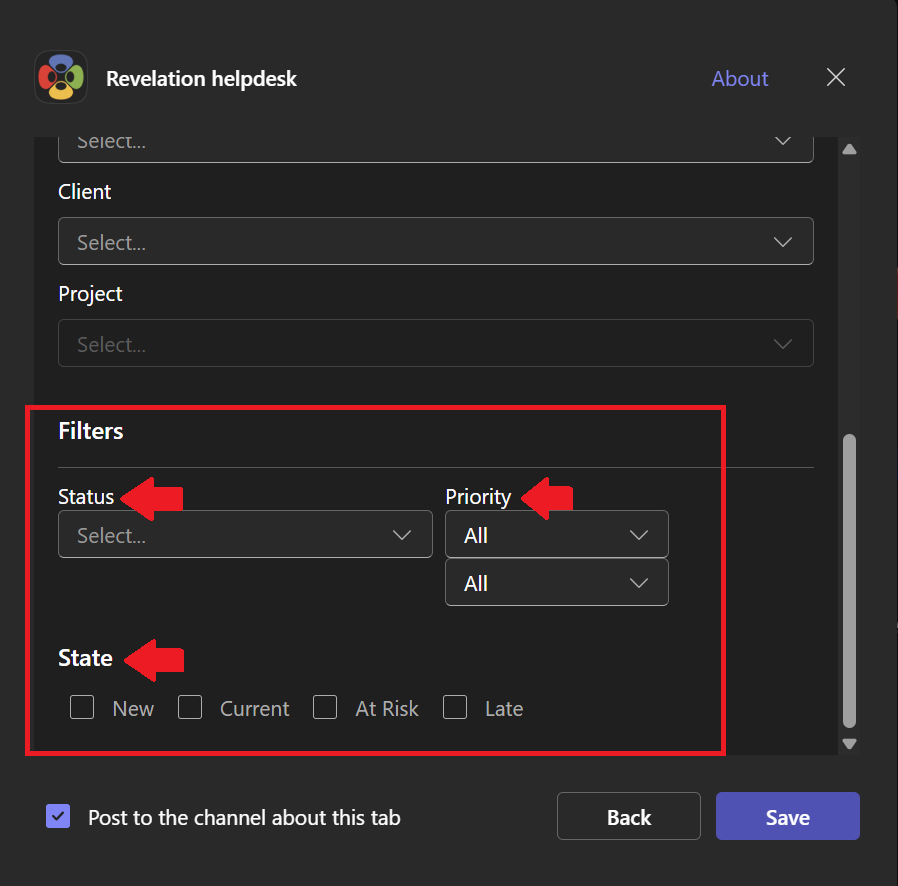
Filter by:
- Status
- Priority
- State
Once you finish selecting your desired filters, click Save.
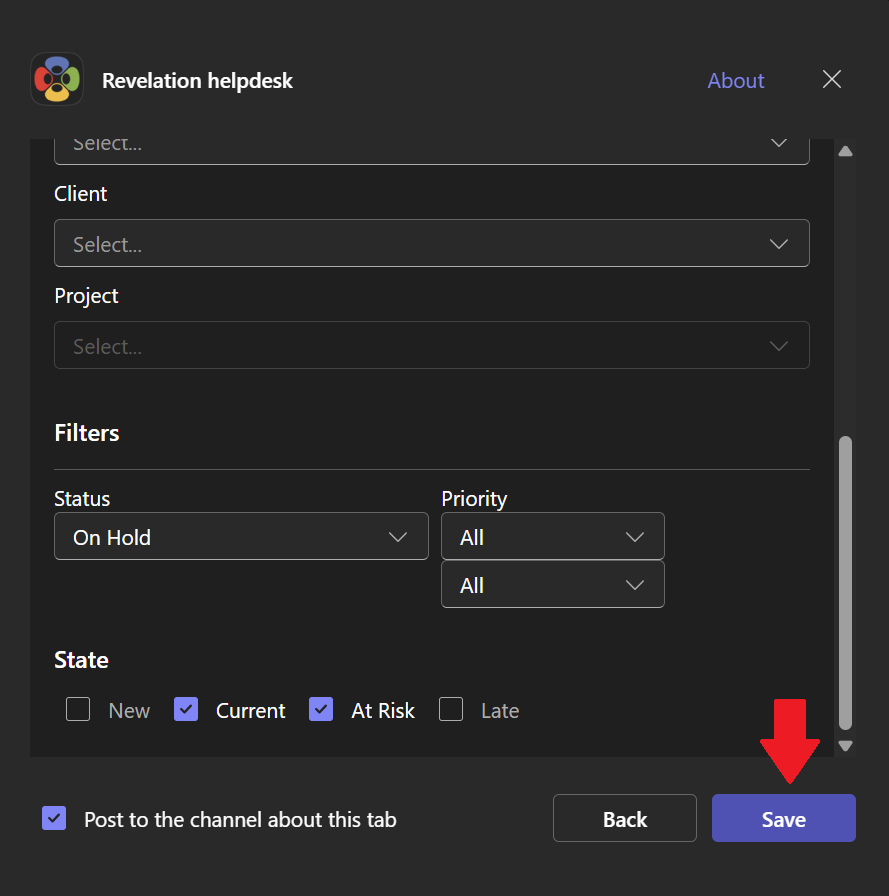
NOTE: Applying filters is optional when configuring your tab. You can choose to display all tickets or refine the view using filters.
Your tab will now be added to the top of the channel with all selected filters applied. Revelation will automatically post in the Teams channel once the tab is created unless the option is toggled off.
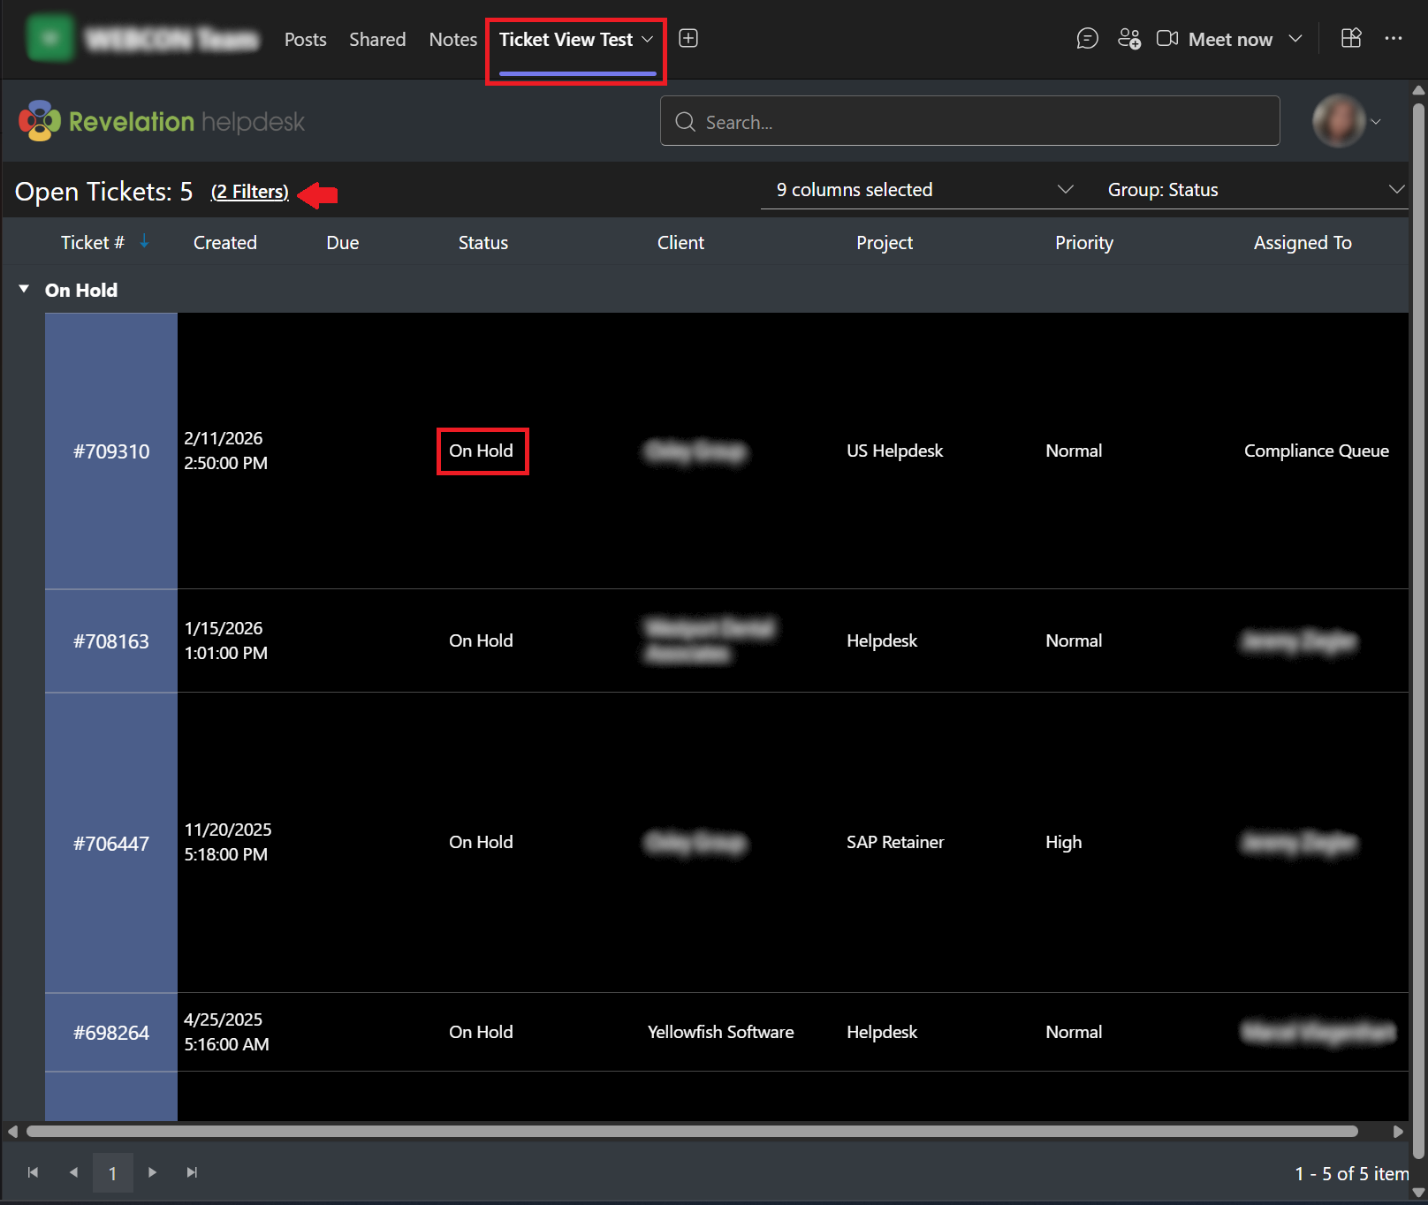
To group the tickets by a specific filter, open the drop-down menu at the top right corner of the ticket field and choose your preferred grouping view.
If you need to make changes to your new tab, click the down arrow next to your tab name to expand your options.
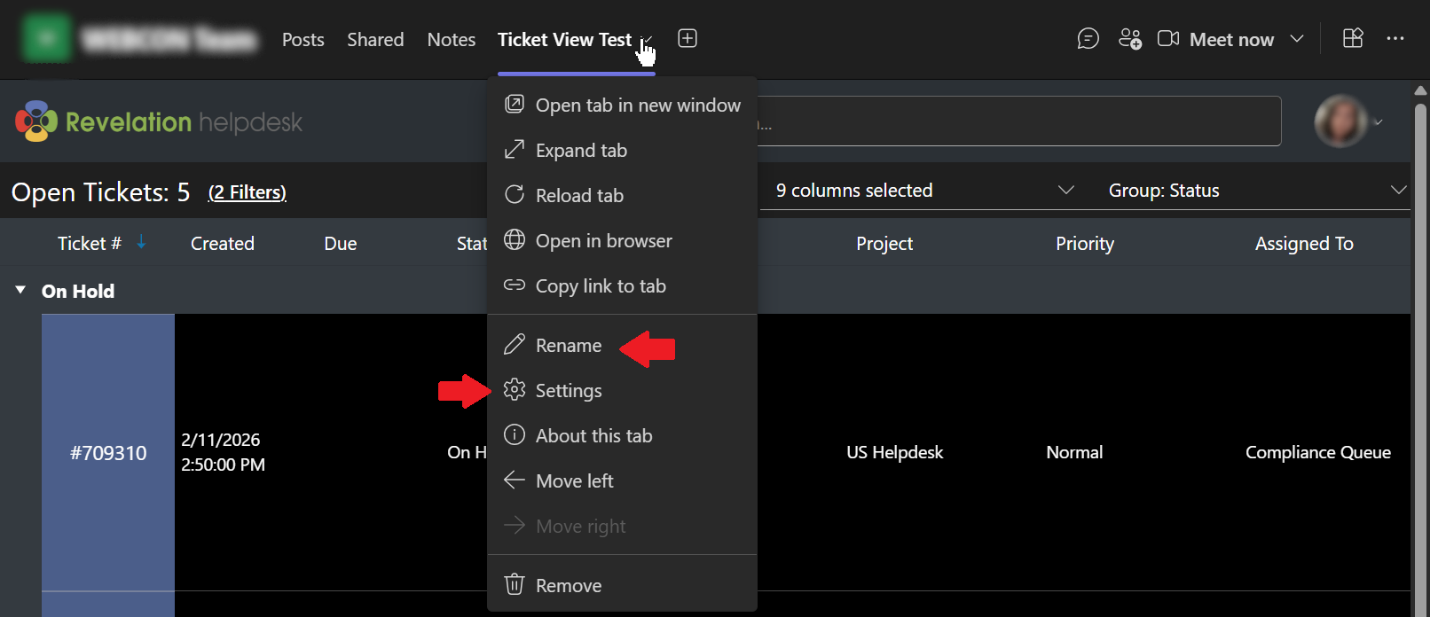
To change the name of your Tab, choose Rename and finish renaming your tab.
To change the view and/or filters, choose Settings and update your views and filters as needed.
Once changes have been made, click Save and click out of your tab. When you return, changes will be applied.