All open tickets assigned to you are visible, with the screen refreshing every 60 seconds and, by default, listed from newest to oldest ticket. Tickets are color coded, with the colors shown on the ticket number as well as when you roll over the ticket itself.
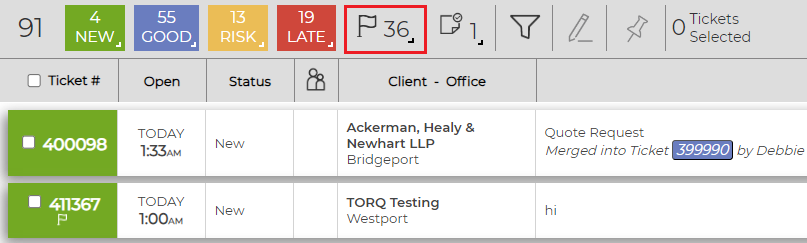
To see the information for the Ticket Summary Bar at the top of the page, click here.
Ticket Number Icons
In the ticket number grid, Revelation separates all tickets in your current view by status (New, Current, Risk, or Late) and allows you to filter by starred, unread, or updated.

Additionally, tickets on your home page will have icons indicating if there is a flag on the ticket, if it has been pinned, set to Auto-Close, starred, revised with Revelation AI (Rai), or if it is a Gameplan ticket. These are indicators to help you find a particular ticket quickly.
 | Ticket has been revised with Revelation AI |
 | Ticket has a flagged note |
 | Ticket is starred |
 | Ticket is pinned |
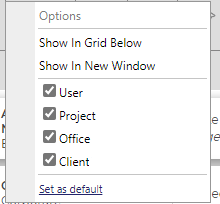
Right click on the Flag icon from the Summary Bar, and you will be able to filter by User, Project, Location and/or Client. Select the options you use the most and set it as the default filter by clicking Set as default at the bottom of the menu.
Information Popup
Ticket descriptions can sometimes be long, especially if logged via an email or the Revelation Bridge. You may not be able to see all the information from the grid view. If you hold your mouse over the description field, you will see a tool tip pop up containing the entire description.
You can also see the last Action Note added to the ticket by holding your mouse over the clock icon that appears on the far right side of each ticket when said ticket is hovered over. This can be turned off by using the Context Sensitive Controls.
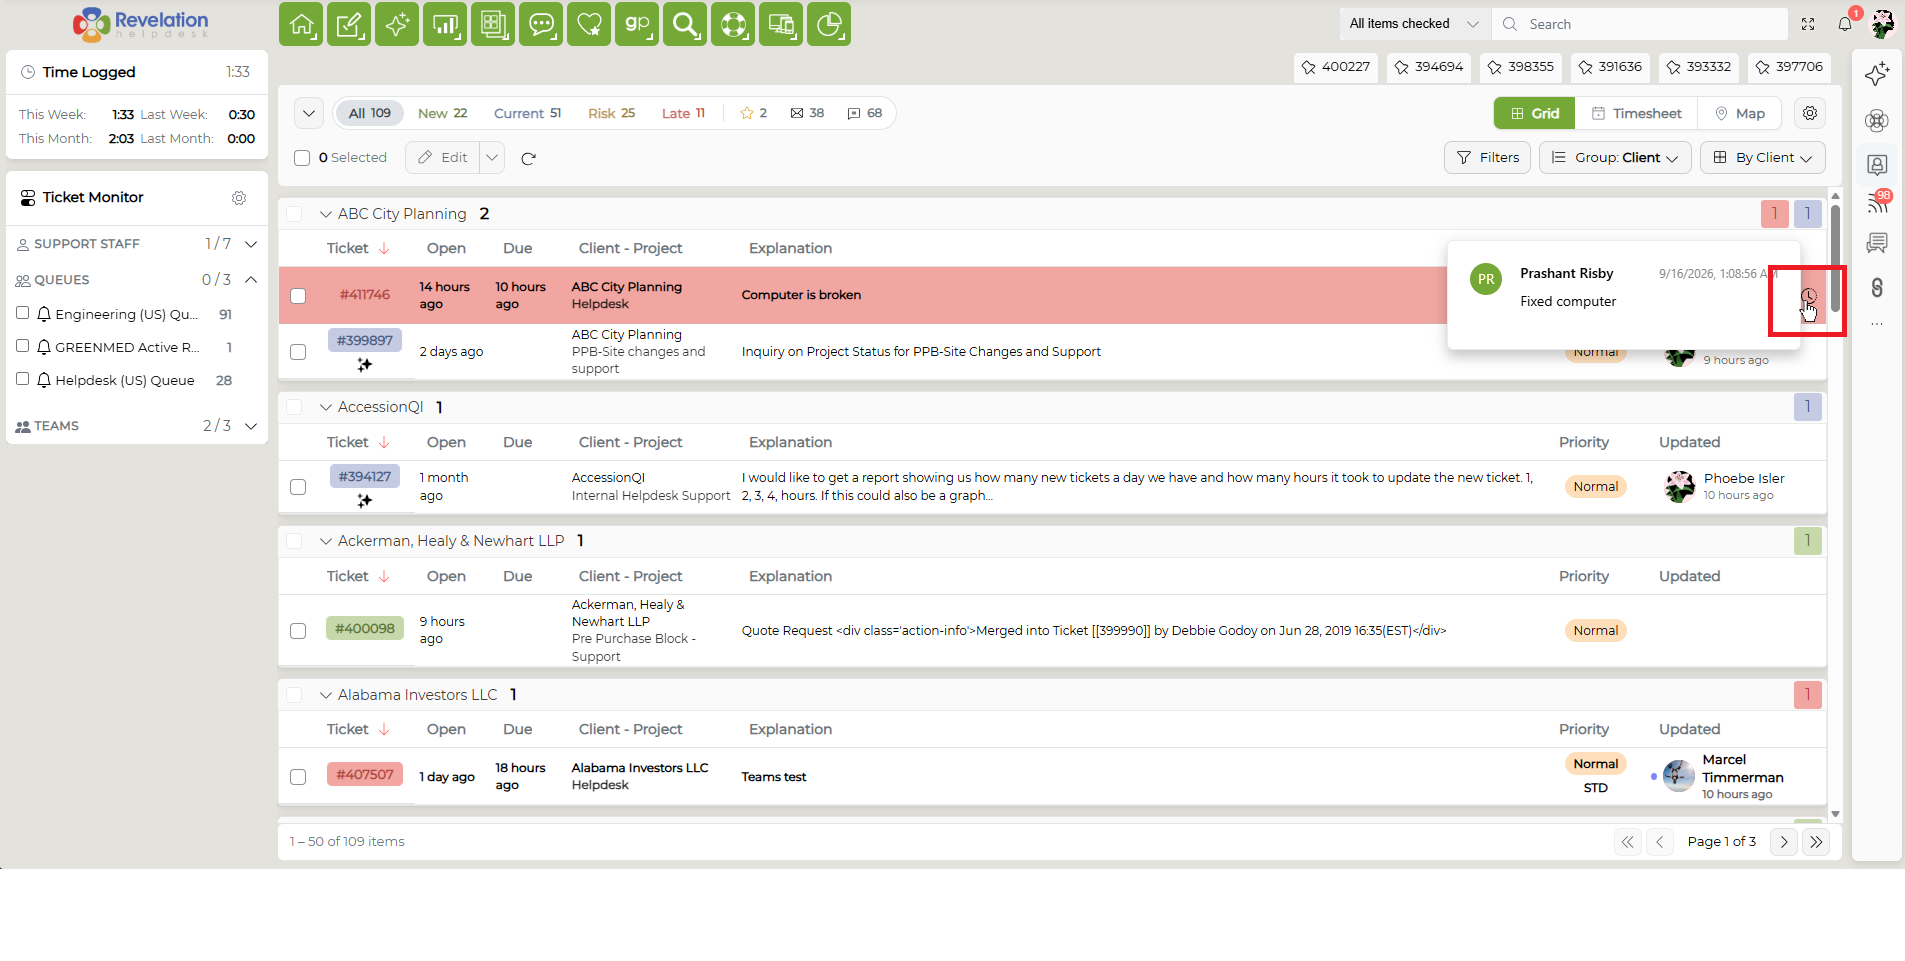
The arrows in the column give an indication if the last action was done internally or sent out via email, etc. If the update was done by an end user, it will appear in the system color for an end user action. If the action was done by an internal user, it will show as the ticket state color. This can be turned on and off in the Permissions tab in the Admin area, and can be set by Access Level or Team.
Note: This only works in the Grid View.
Context Sensitive Controls
On the Grid View, right click in the Description area of a ticket and receive a context sensitive menu.
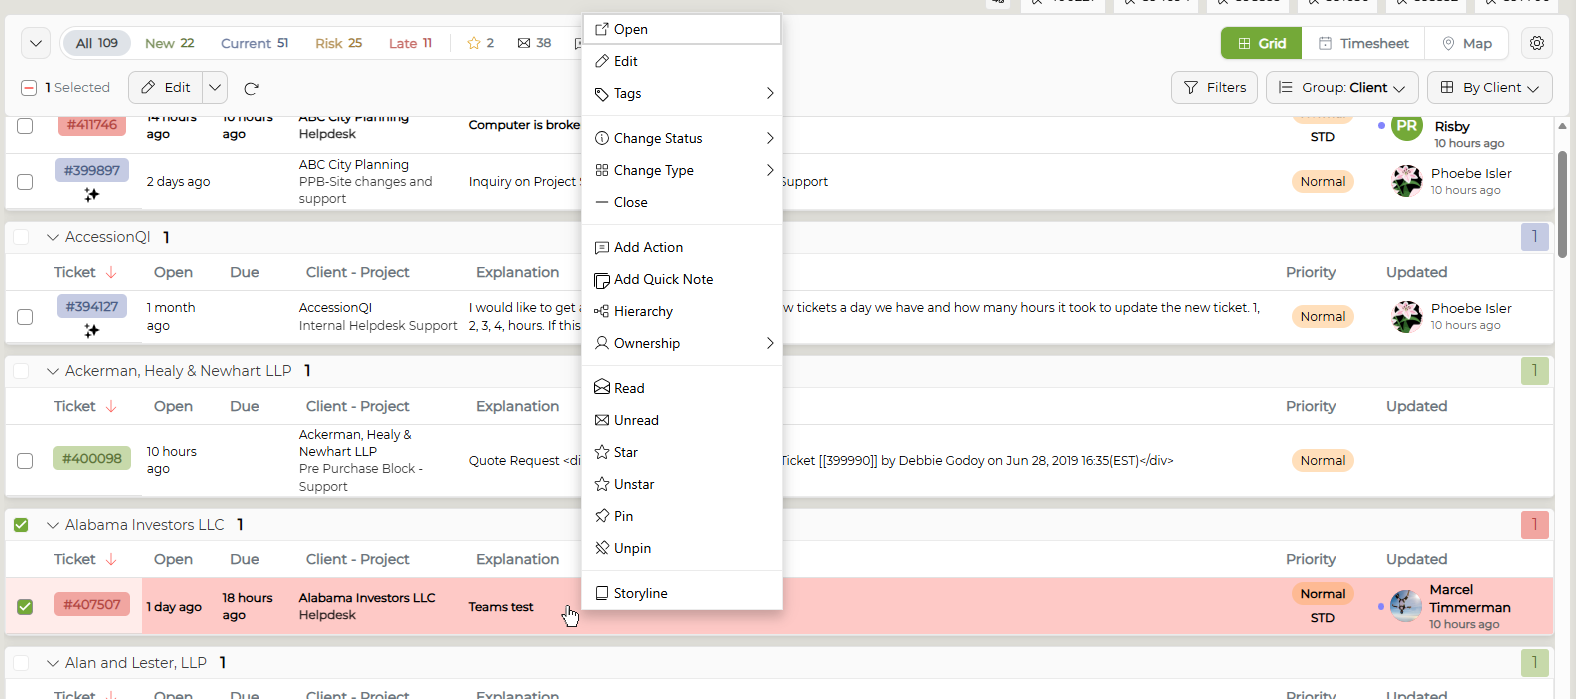
From this menu, you have the option to do several functions:
- Open the ticket in a new tab
- Edit the ticket
- Add ticket tags (link to new page)
- Change your ticket's status - based on the statuses available in your system
- Change your ticket type - based on types available in your system
- Close the ticket without needing to navigate into the ticket
- Add an action note to the ticket
- Add a quick note to the ticket - based on the quick notes available in your system
- Change the ticket's hierarchy
- Change the ticket's ownership - own, join, or update the ticket assignment
- Mark ticket as Read/Unread
- Star/unstar the ticket
- Pin/unpin the ticket
- View the ticket's storyline in a pop-up window
NOTE: If the function is not activated in the Admin area, the option will not be visible.
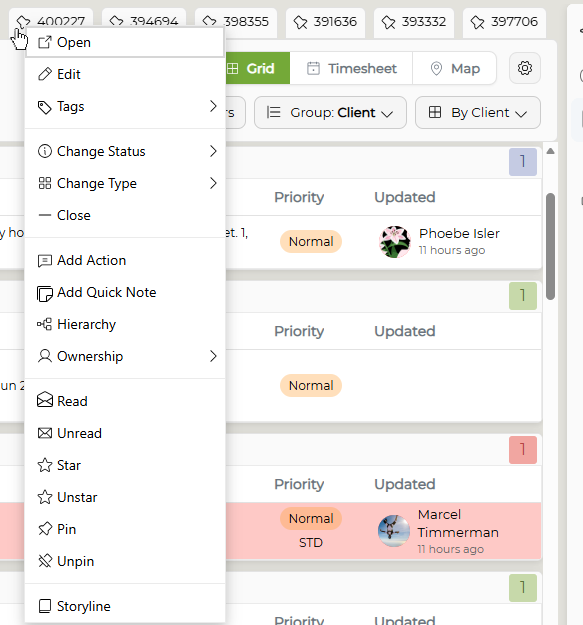
Controls can also be used in the Pin Dock area, if you have tickets pinned. Simply right click on the pinned ticket, and select the action needed - the same menu will appear.
Storyline
Storyline shows the timeline of your ticket since its creation: system notes, how long it has been open, the current status and any changes to it, any Action Notes added, etc. all appear in one quick view. Right click on the ticket to bring up the Context Sensitive Controls. Select the toggle Storyline option at the bottom to bring up the visual.
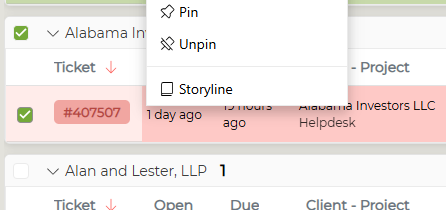
The Storyline will appear in a pop-up window, complete with the timeframe controls.
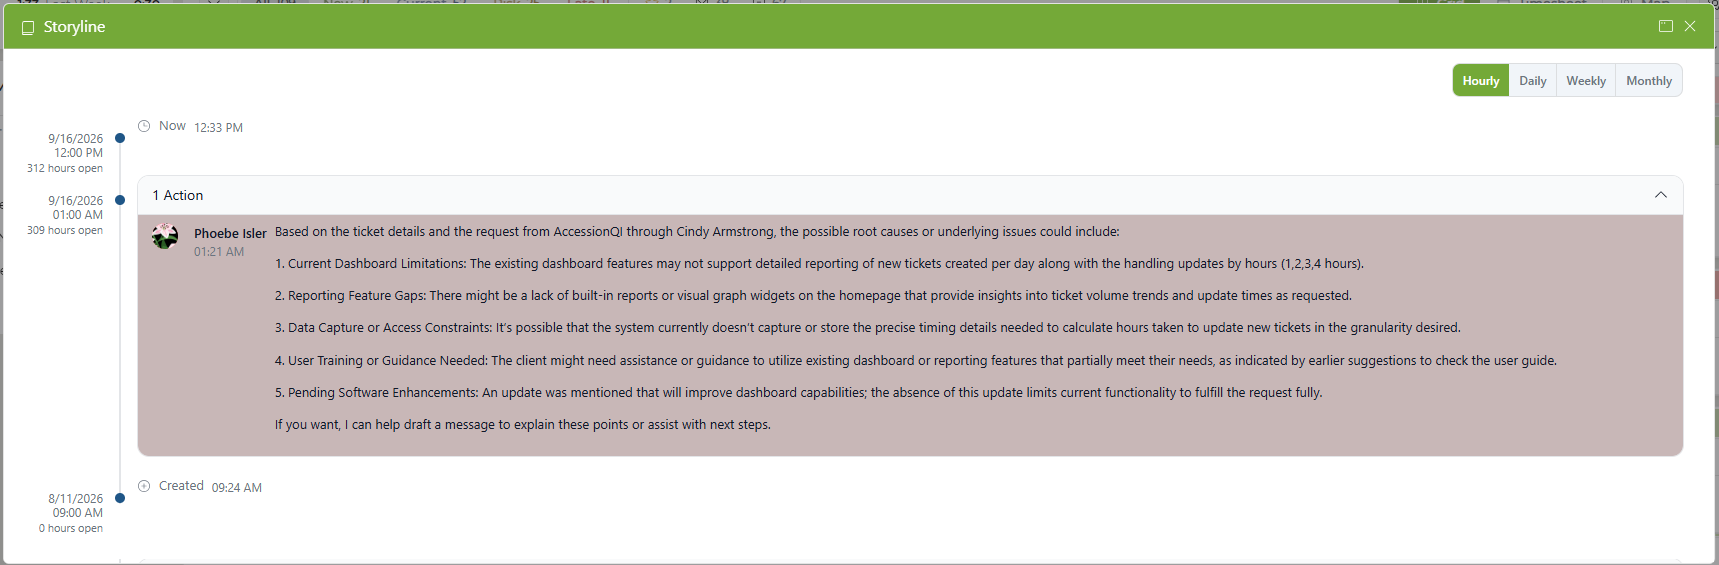
To expand the storyline view, click the maximize button: 
To shrink the storyline view window again, click the minimize button: 
To close the Storyline pop-up, click the close button: 
Save and Close from Context Sensitive Controls
Select Add Action by right clicking on the Grid View; this will bring up an Add Action note dialogue box. Once you complete your notes, you have the option to Save (by clicking the Save Action button in the lower right corner), or you can click the arrow and select the Save and Close ticket option.
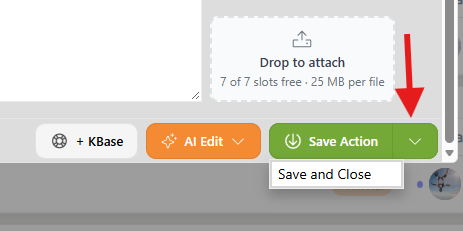
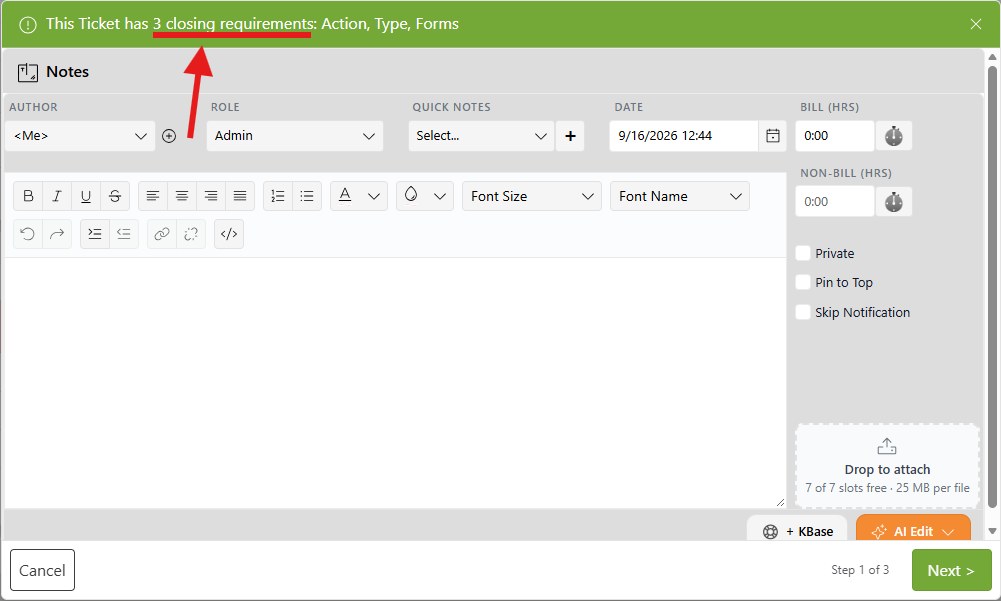
If there are missing elements from the ticket when you attempt to close it, Revelation will show you a pop-up window prompting you to complete them prior to closing it. Once you hit Save, the ticket will close.
Homepage Settings
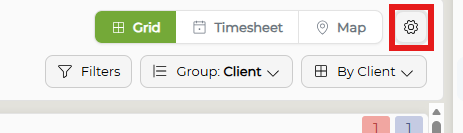
Your Revelation home page can be fully customizable depending on how your Administrator configures your Revelation instance. To make changes to your home page, select the gear icon next to the Grid/Timesheet/Map selection buttons.
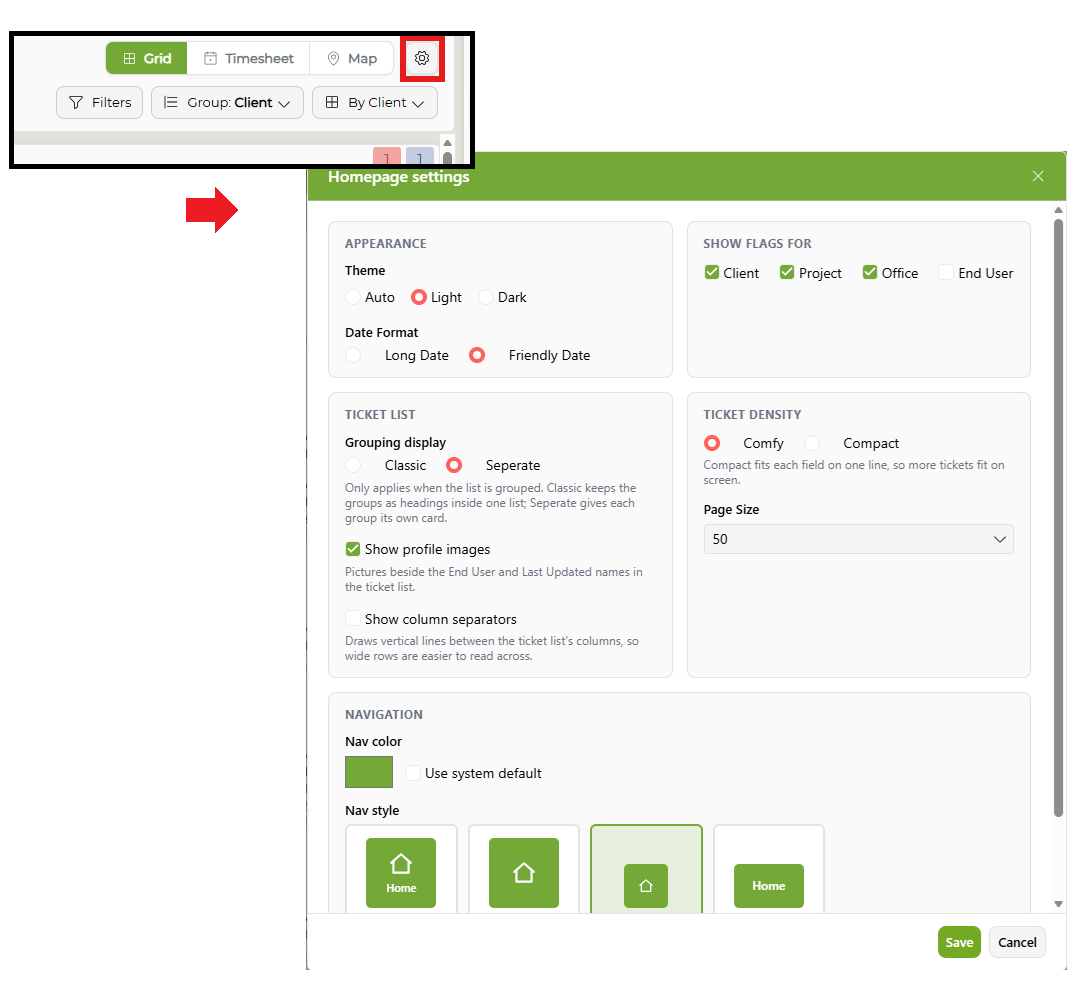
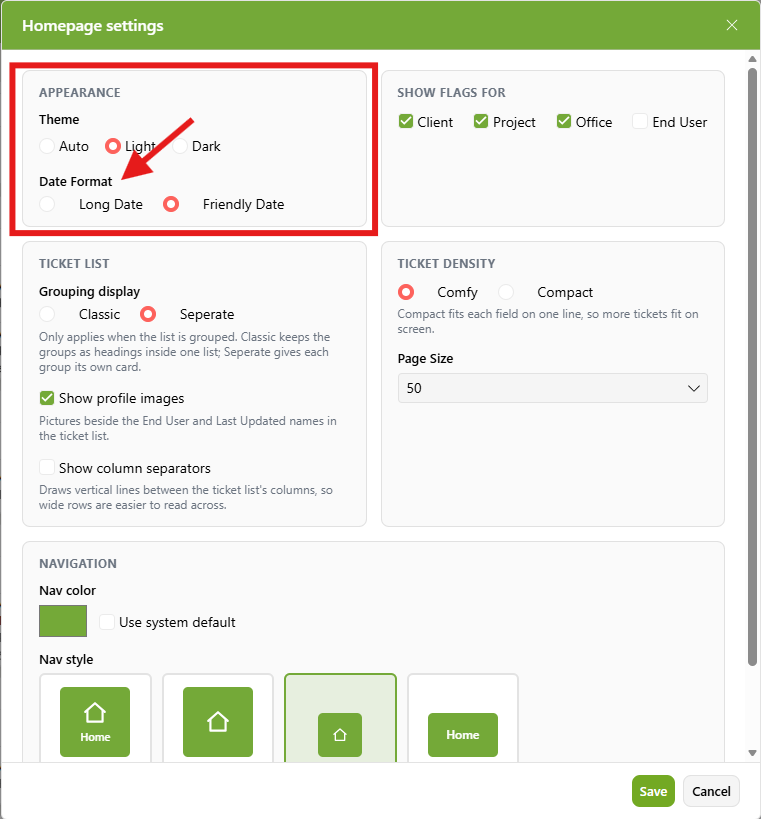
Your Homepage Settings window will appear; this covers most of the appearance-related customizable fields that can be adjusted on your home page.
NOTE: Homepage settings can only be adjusted if user customization is configured by your Administrator.
Appearance
- Select your Revelation theme (Light, Dark, or Auto) and preferred Date Format (Friendly or Long)
Show Flags For
- Select which flags you need visible on your home page
Ticket List
- Select your preferred grouping display (Classic - keeps groups in one list card; Separate - gives each group its own list card)
- Toggle profile images for 'End Users' and 'Last Updated' on or off within your ticket grid
- Turn column separation lines on or off within your ticket grid
Ticket Density
- Choose between Compact view (condensed line items) and Comfy view
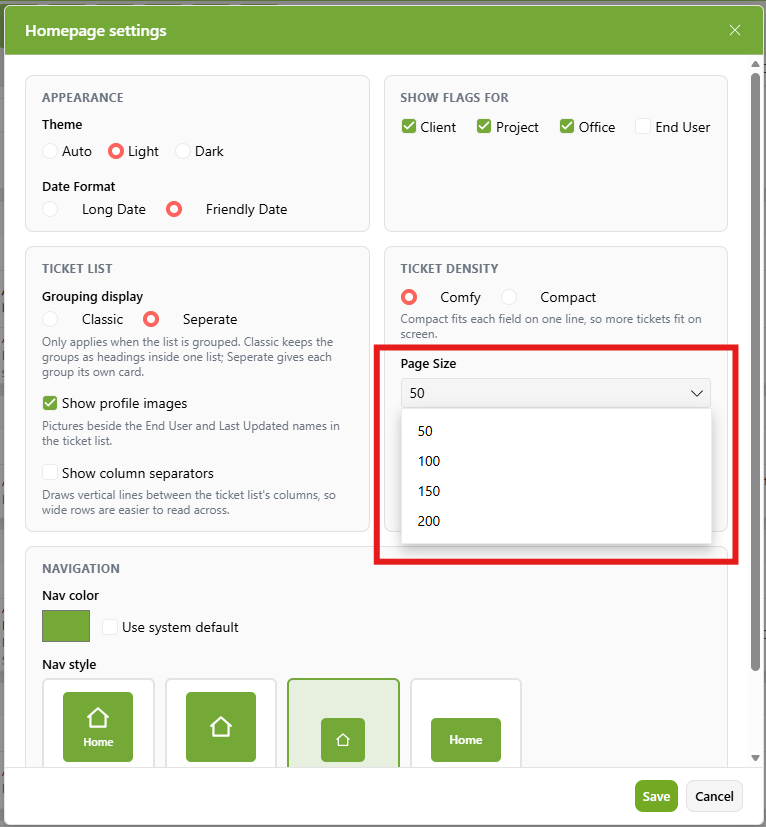
- Choose how many tickets are displayed on each page
Navigation
- Select your preferred navigation color - this will change all navigation accent colors within your specific Revelation instance
- Choose your navigation button size and style
Set Number of Tickets Visible
If you have a large number of tickets on your home page, you can customize how many tickets appear on your home page at a time. To update this, select the Homepage Settings gear at the top right corner of your dashboard.
From there, adjust your preferred "Page Size" from the drop-down menu. Once selected, click Save.
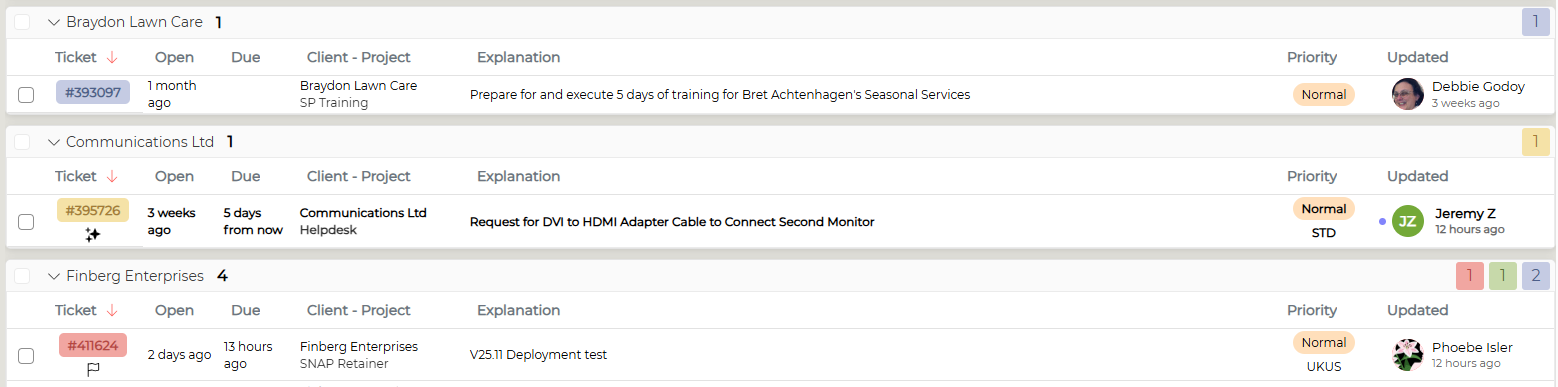
The preferred group view header will display how many tickets are in said group. A breakout of how many tickets in each status there are can be located on the right side of this header. If a group's tickets continue onto the next page, the group header will display the number of tickets currently on that page (not all relevant tickets).

Ticket States
Revelation has four ticket states - New, Good, At Risk and Late. Tickets are color coded in the system based on the state of the ticket. The state is determined by times set in the Administration area and the due date for the ticket. The Ticket States are colored in Revelation as follows:
-
New tickets are green
-
Good tickets are blue
-
At risk tickets are yellow
-
Late tickets are red
SLA
If SLA is active, the colors will change based on the settings. Without an active SLA, tickets will change based on an assigned due date. If there is no due date or SLA, the ticket will start green and then remain blue until closed.
Any column with a Date includes a time associated with the date (Open, Due, Resolve, Actioned). The time for all but Actioned is based on the escalation engine associated with the SLA's in the system. The Priority column will also include the SLA associated with the project, if the module is activated.
Date Views
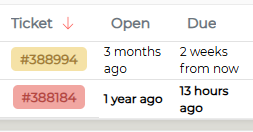
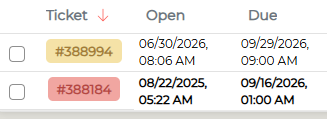
The text in the date field will change for the Open date as time goes on. You have the option to toggle between "Friendly" and "Long" date display.
When using the "Friendly" date format, the date fields (Date Opened, Due Date) will use language indicators instead of standard numerical format - "# hours ago", "# days ago", "# weeks ago", etc. On hover, the Revelation tool tip will display the full date and time in numerical format.
When using "Long" date format, the full date and time in MM/DD/YYYY, HH:MM will be displayed.
| "Friendly" Date | Long Date |
 |
 |
To change how Revelation displays time, open your Homepage settings (link?) and select the radio button you prefer.
The Action column will show when the last action was shown. If the ticket was last actioned by someone other than yourself, including your client or by email parser, the date in the Action column will appear bold.
To see the exact date and time something was opened, due or actioned, hover over the date with your mouse. The date and time will appear.
Multi Edit
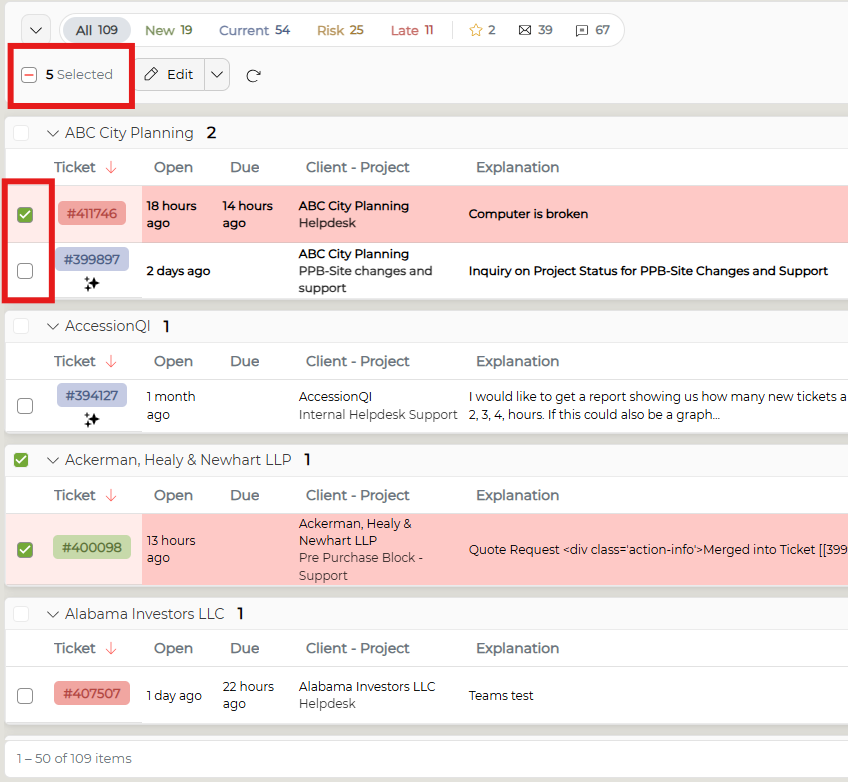
If Multi Edit is enabled, you will see the following additional field at top of your home page, as well as check boxes to the left of the ticket numbers, depending on if the function is set for user level or Team.
This feature is not available for Core users.
Pin Dock
If Pin Dock is enabled, you may see a list of pinned ticket numbers below the buttons, and the multi-pin icon to the right of the multi edit icon.
This feature is not available for Core users.

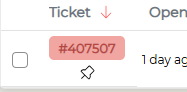
When a ticket is pinned, you'll also be able to see it in the Ticket # column of the grid view.
Custom Navigation
If Custom Navigation is enabled, Admins and Super Admins will have an additional tab with three dots on it (...). Clicking on the tab will take you directly to the Custom Navigation options in the Administration area, so a customized tab can be added by Access level or Team.
This feature is not available for Core users.

Set Home Page Views
On the left side, there are four buttons available to change your view of the home page. These are Grid View, Map View and Timesheet view.

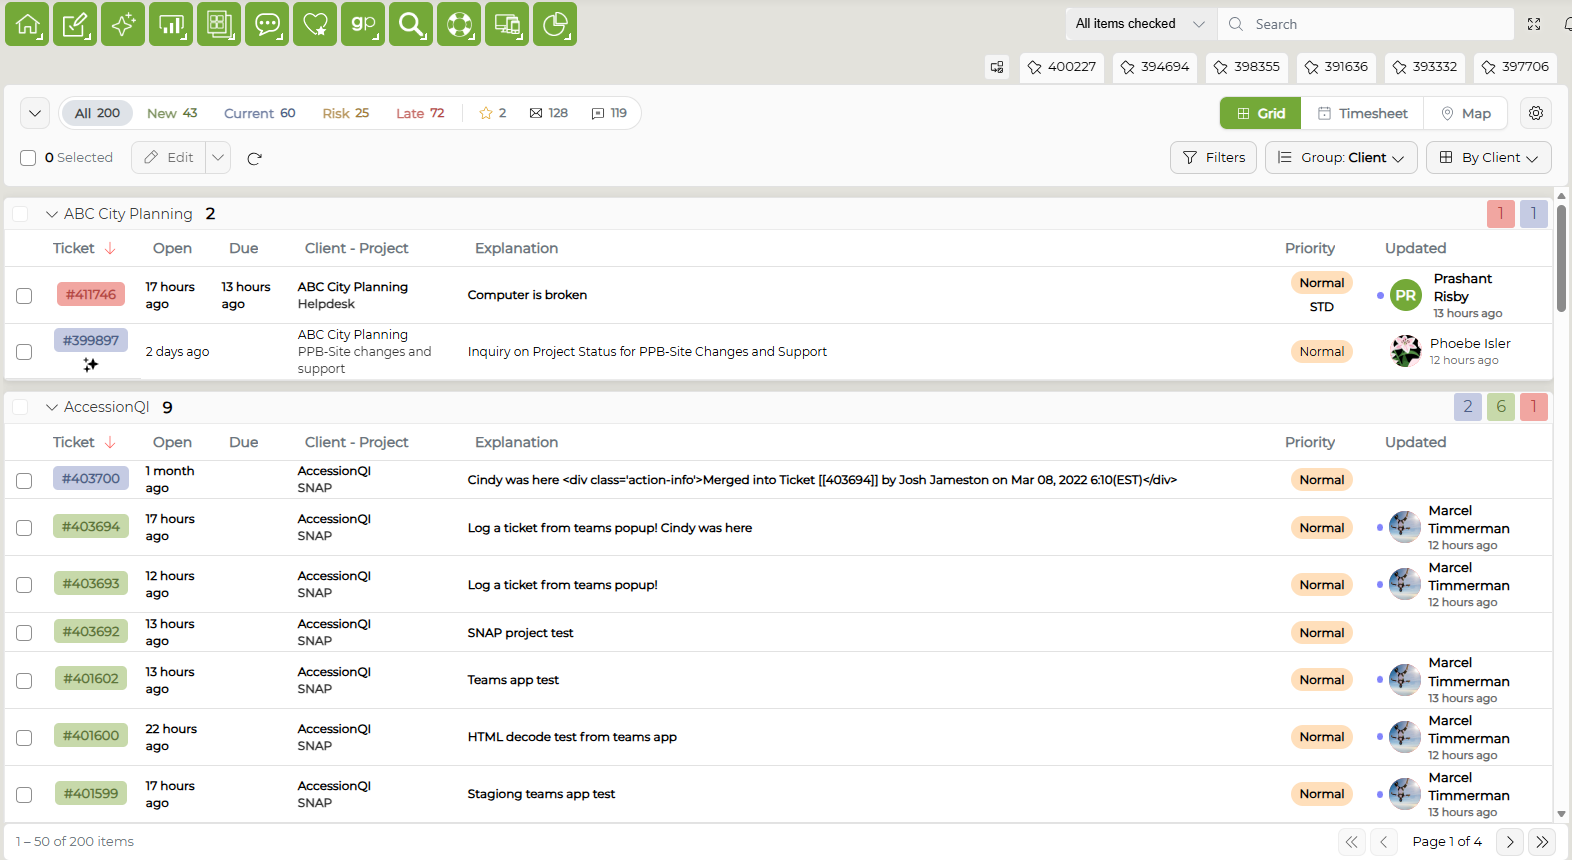
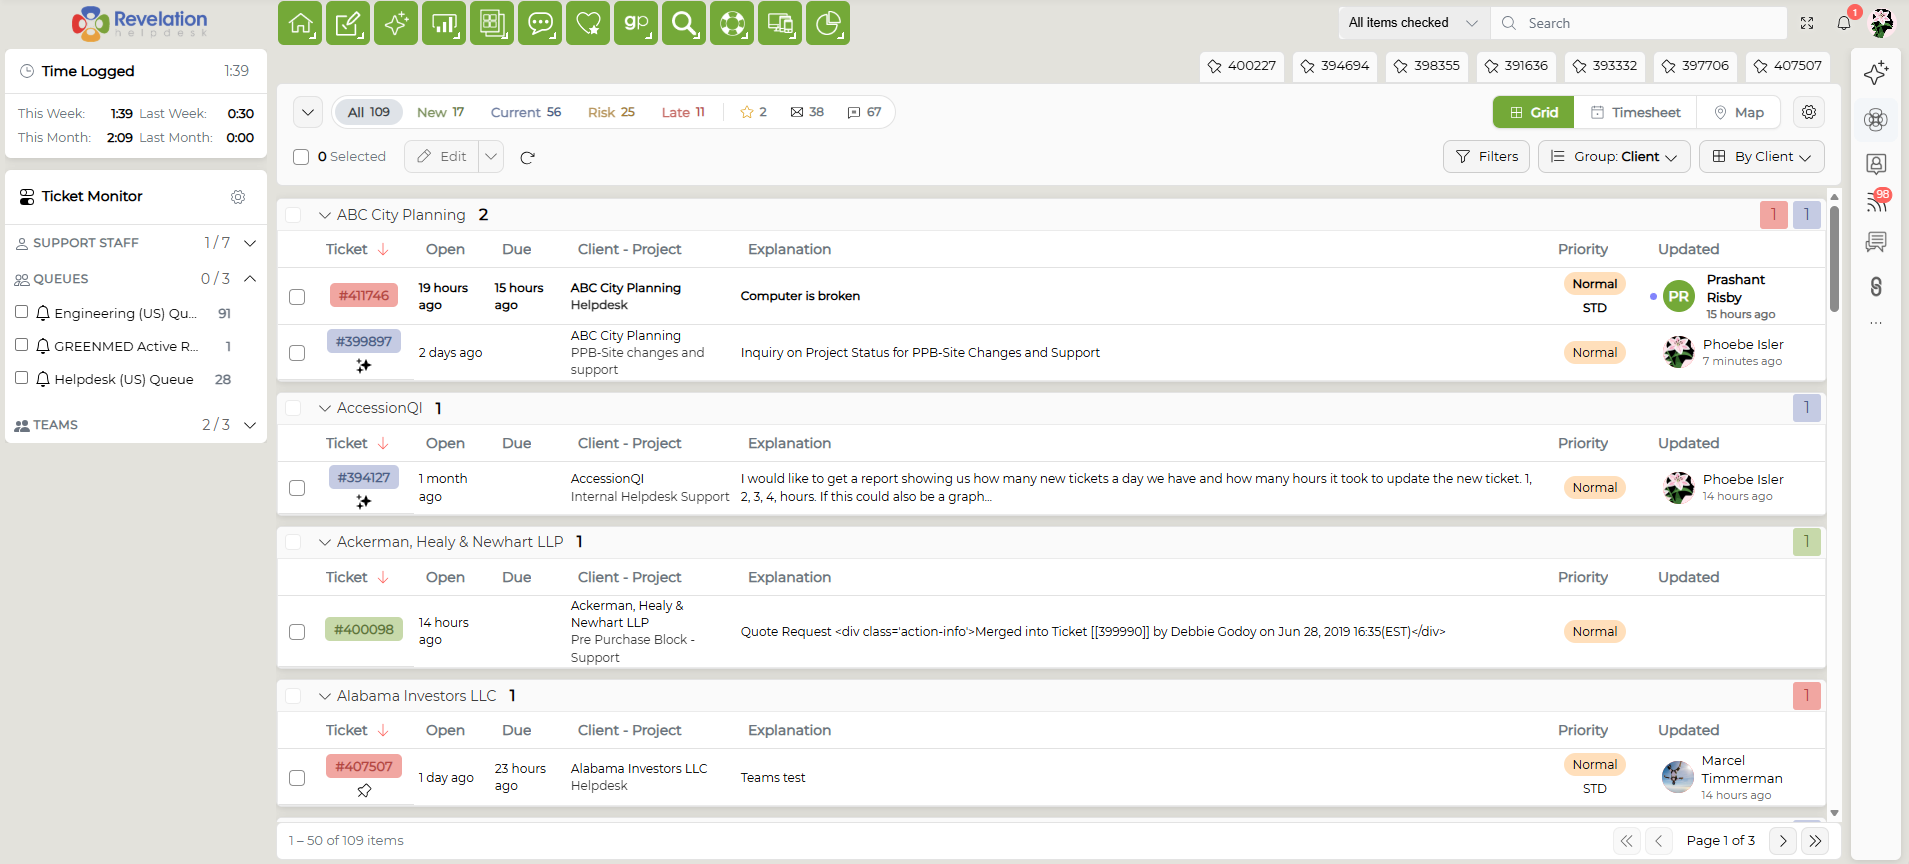
Grid view is the basic home page view which will be used throughout this help guide. This view displays your list of tickets based on how your Ticket Monitor and grouping settings are configured.
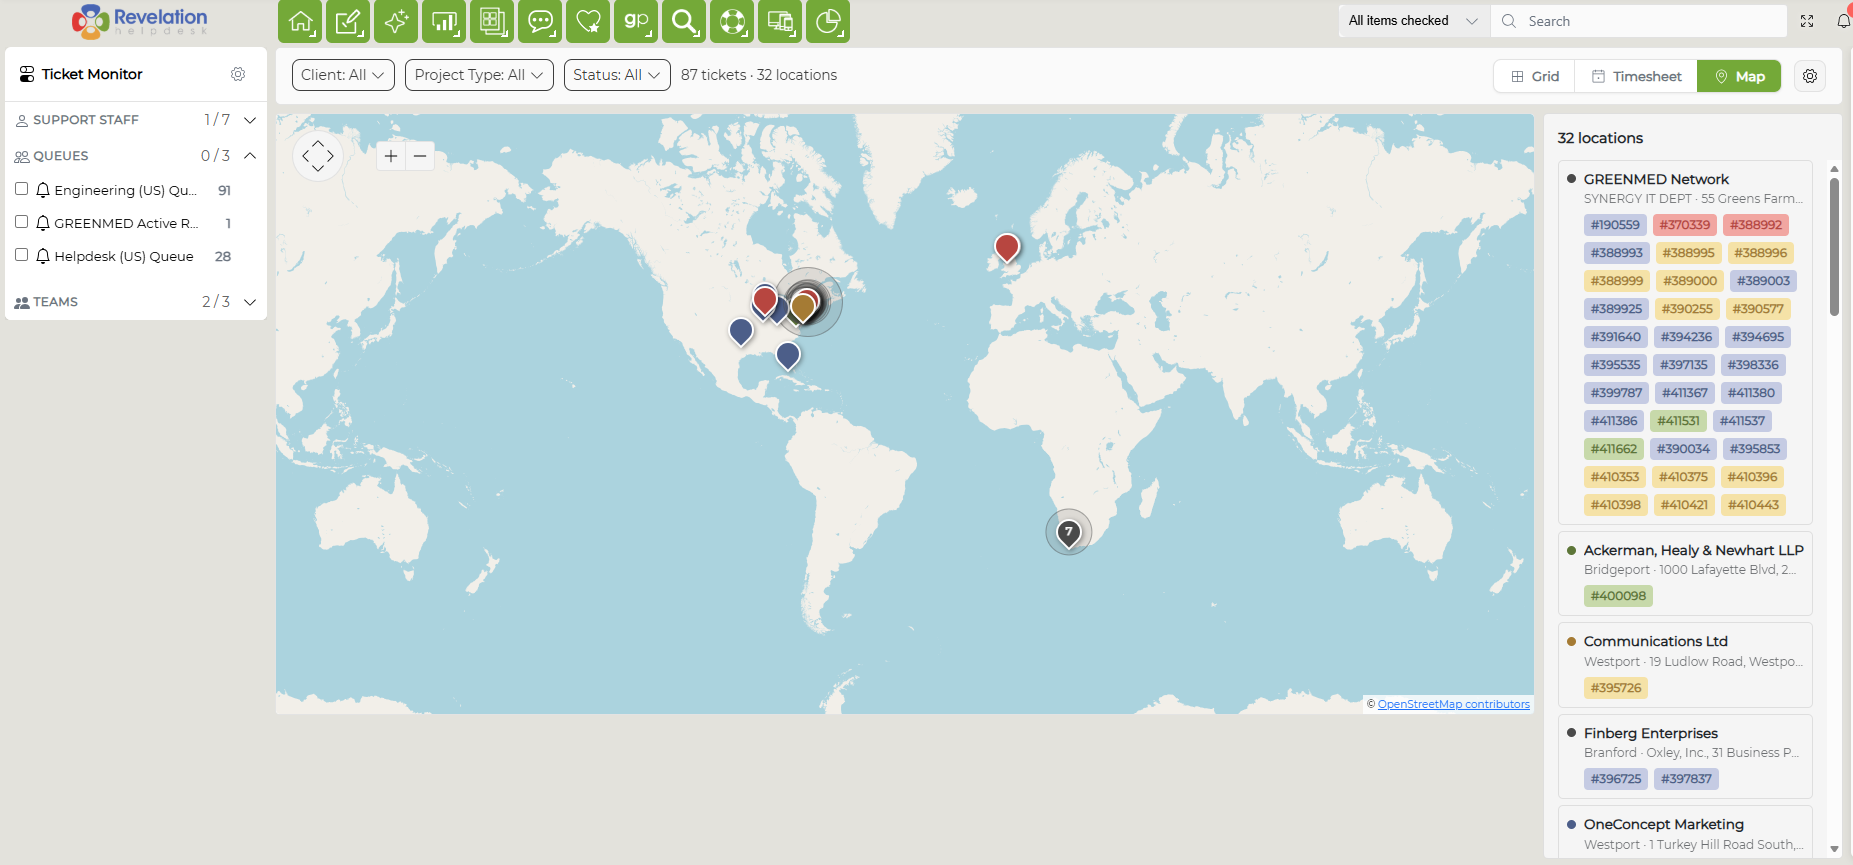
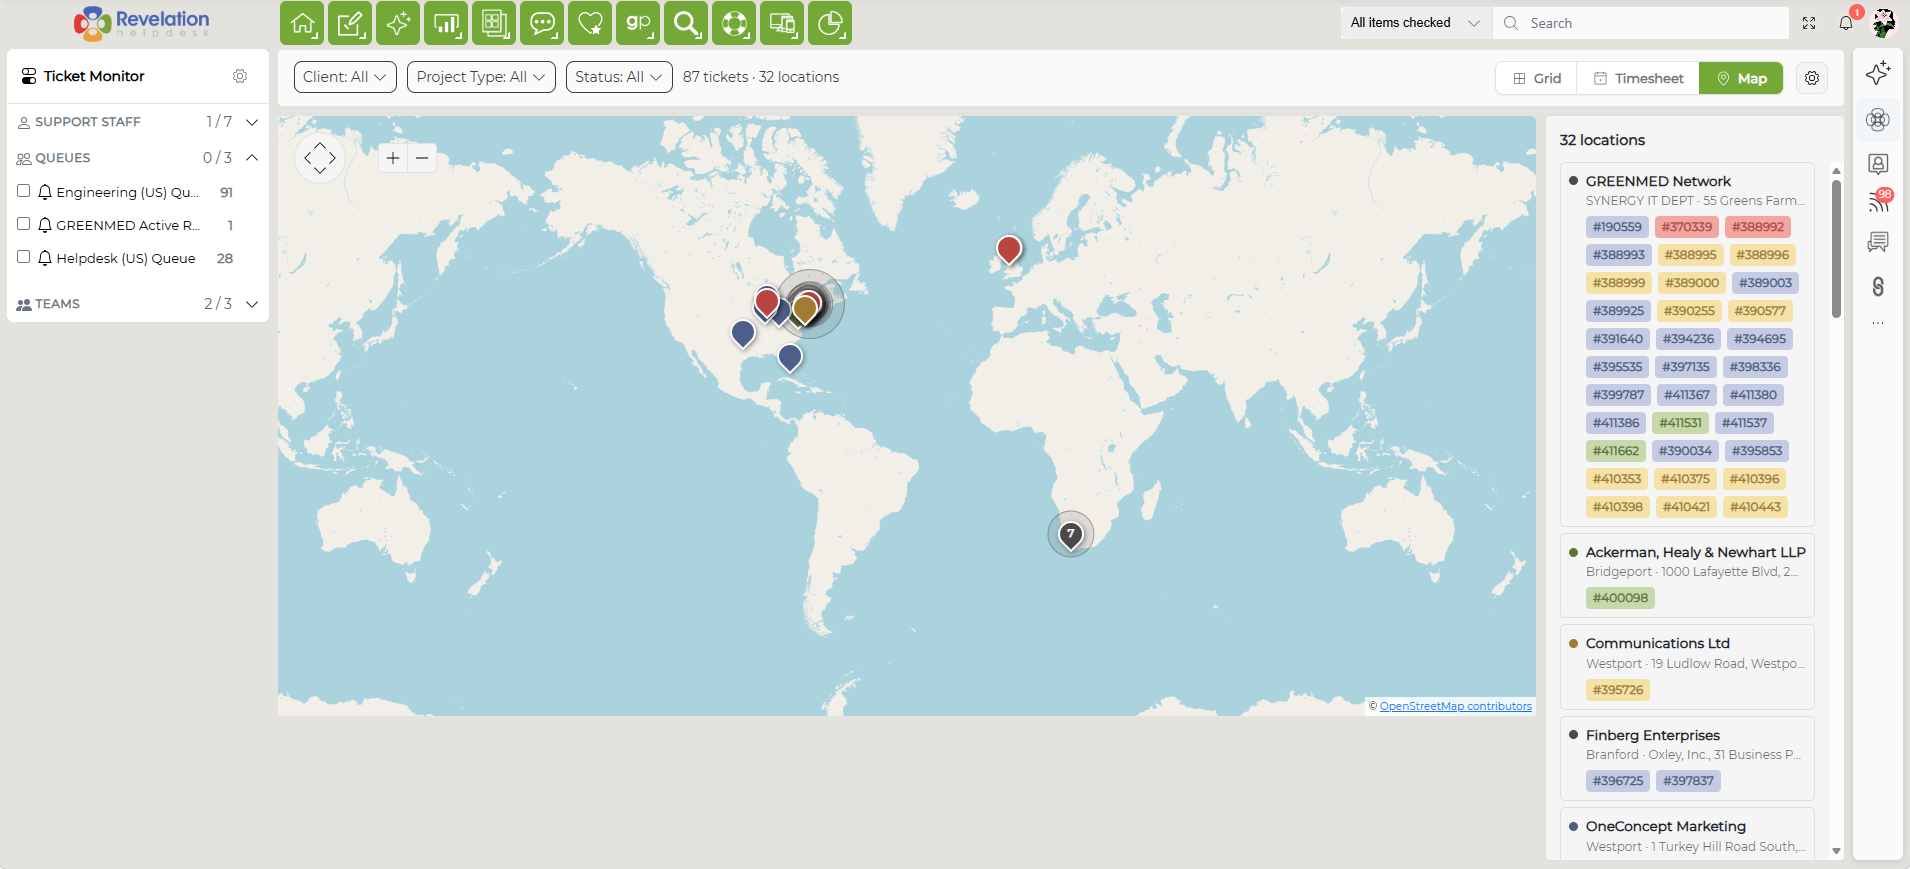
The Map button shows the map view of your active tickets, showing their location on a GoogleTM map. This feature is activated in the Admin area, under Ticket Settings - Configuration.
This feature is not available for Core users.
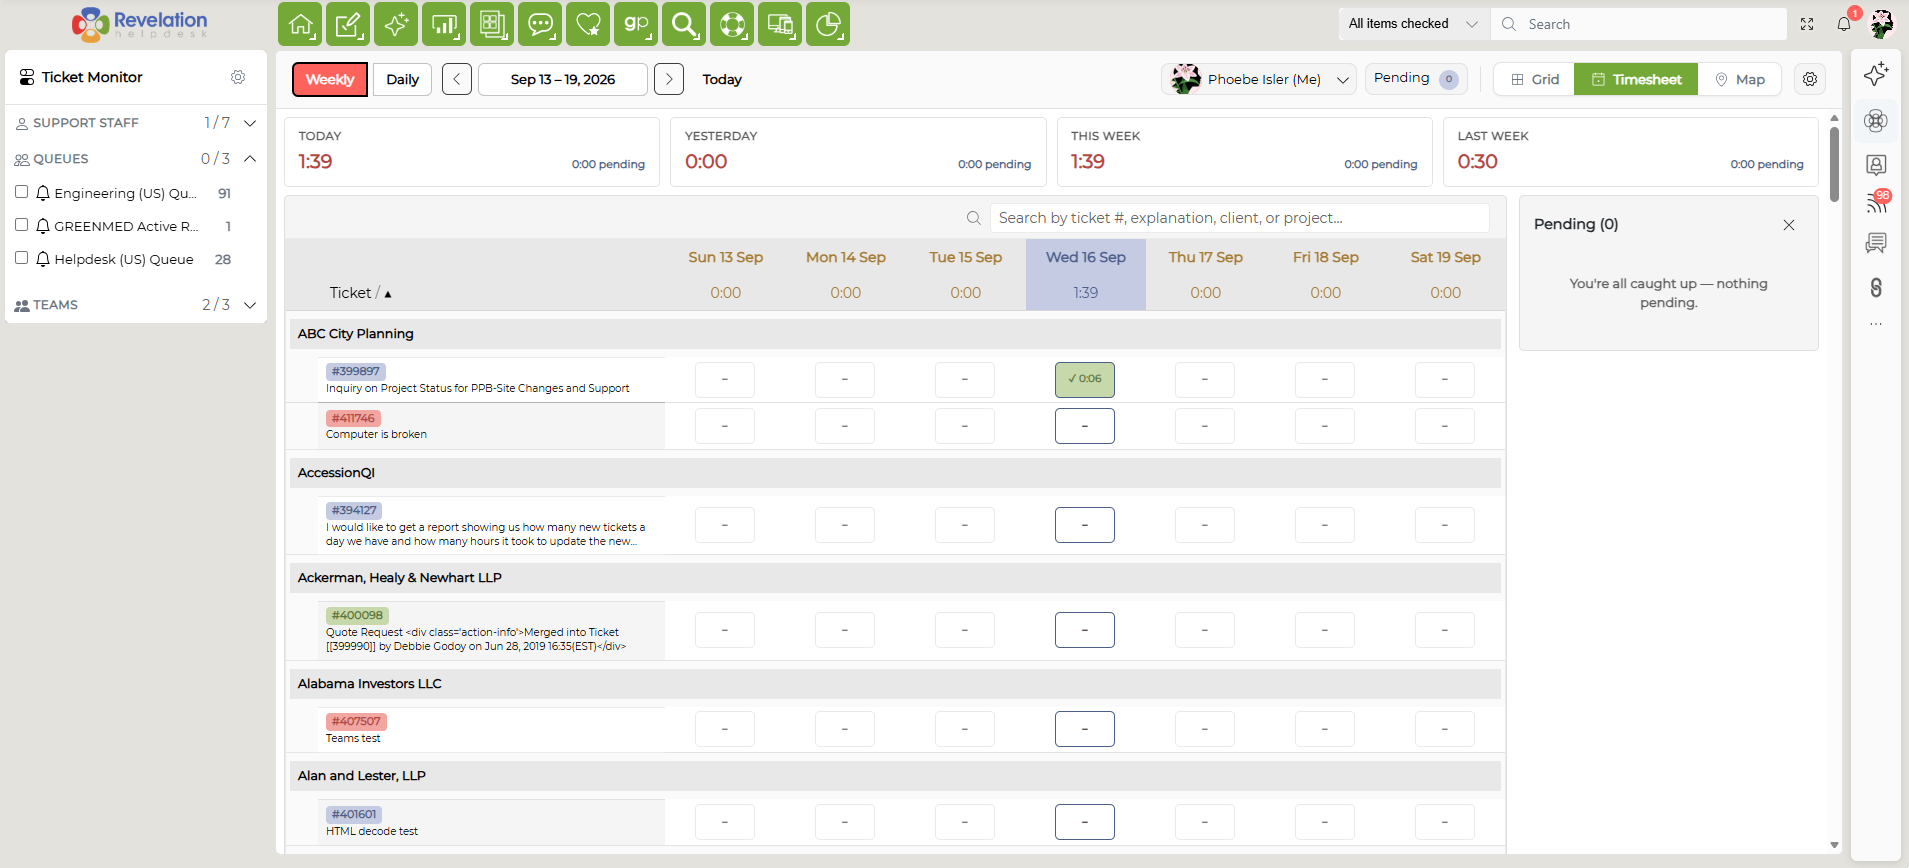
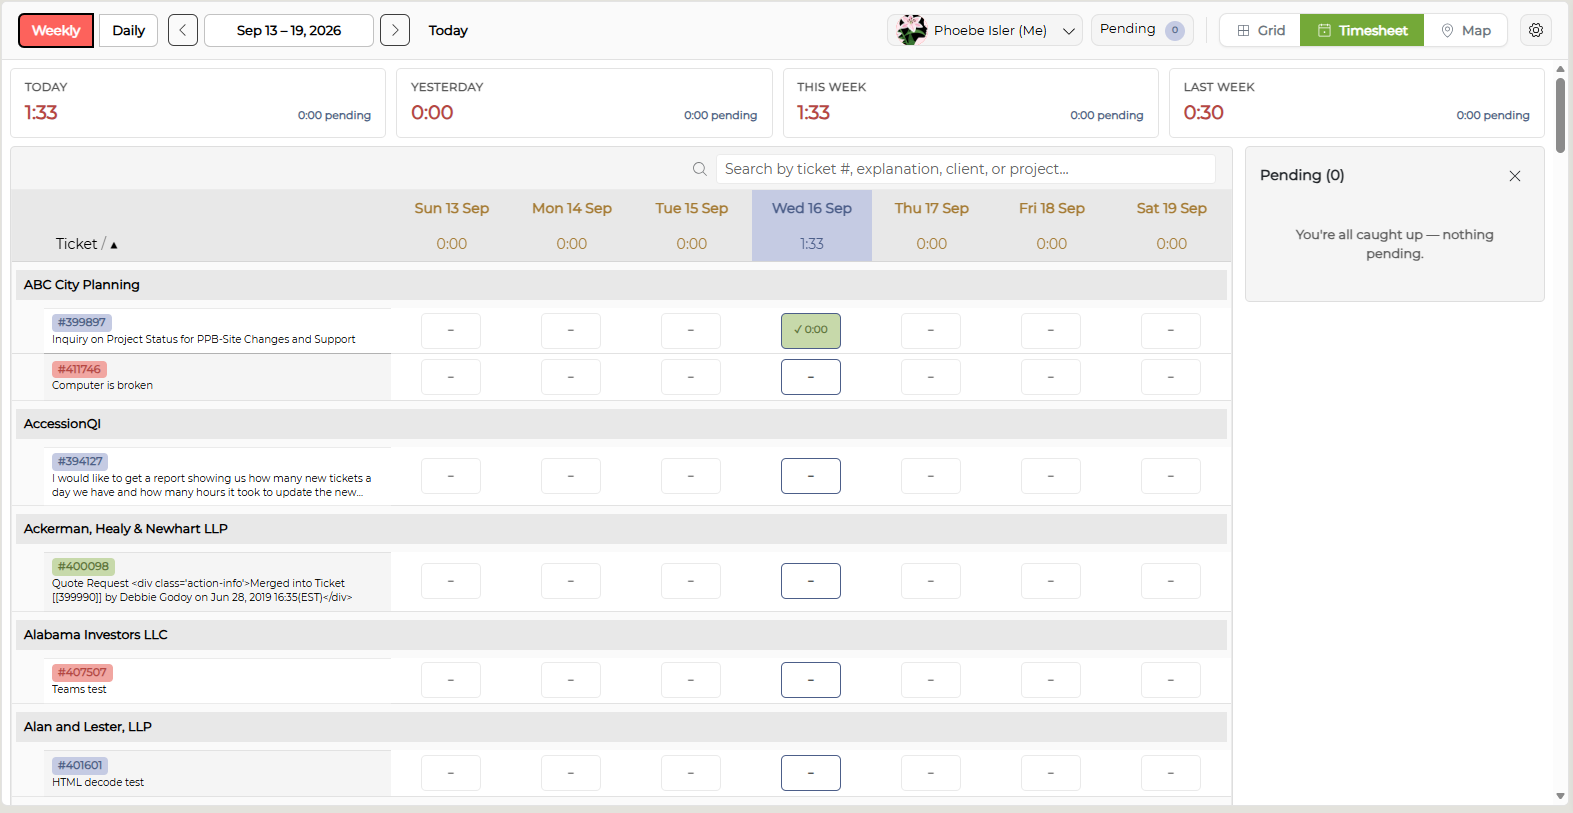
The Timesheet view allows users to add action notes and billable time across multiple days for a particular ticket or against multiple tickets. You can add time either by day or by week (pictured below).
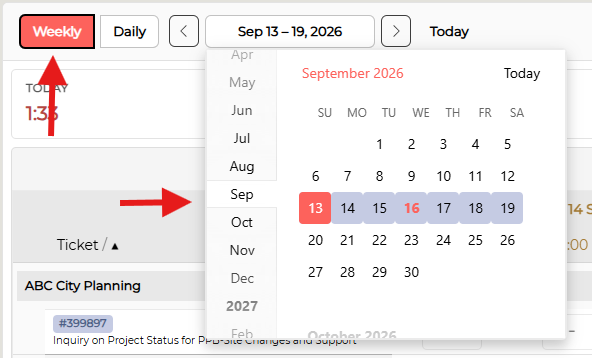
The week can be chosen by selecting the Weekly button and then clicking the dates to open a calendar view.
This feature is not available for Core users.
Parent/Child Tickets
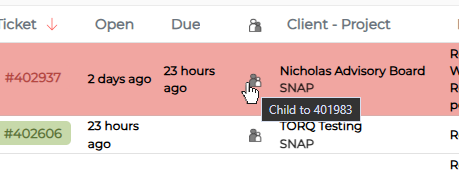
Parent/Child tickets are visible on the home page. Move your cursor over a Child ticket to see the Parent ticket number.
Full Screen Home
By unlocking the fly out on the home page, you can have your choice of the grid, map or timesheet view as a full-page view:
Grid View:
Map View:
Timesheet View: