
If you need to change/add an Internal User assigned to a Ticket, you can re-assign the ticket as necessary. This can be done from your ticket homepage or from within the ticket.
To update a Ticket's assignment from your homepage, right-click on the relevant ticket on your dashboard and hover over Ownership from the context-sensitive menu.
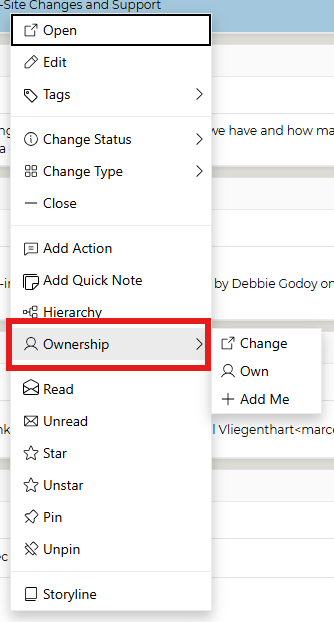
To add yourself to a ticket, select Add Me. You will be added to the current ticket assignment.
To remove all other assigned staff members and just make the ticket assigned to you, select Own. This will unassign all other staff members previously associated with the ticket to make you the ticket's sole owner.
To change ticket assignment information without adding yourself to the ticket, select Change.
A list of available staff and available queues will appear for you to select from.
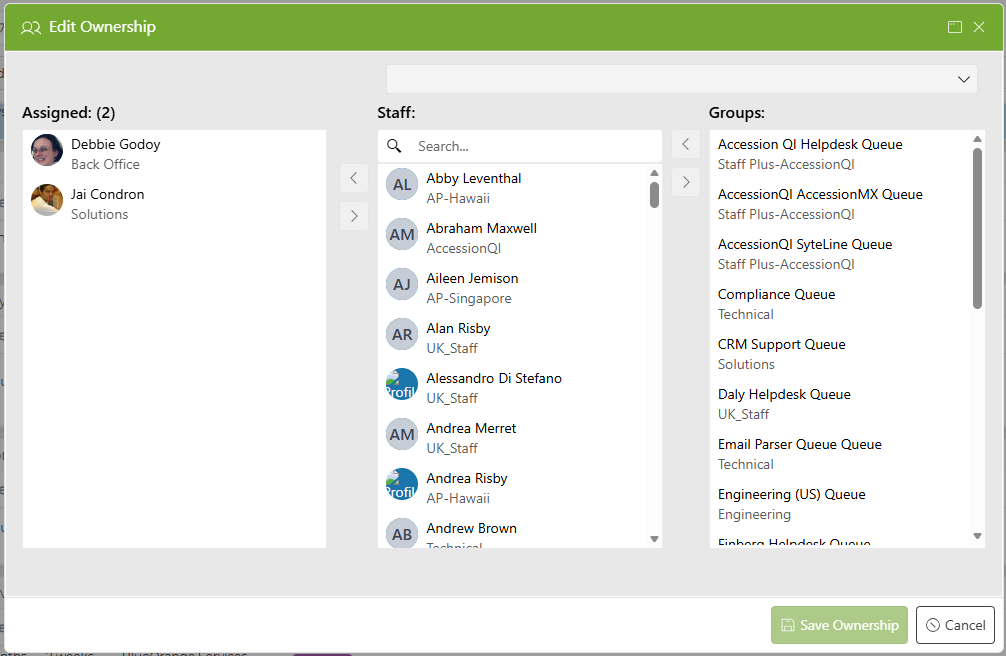
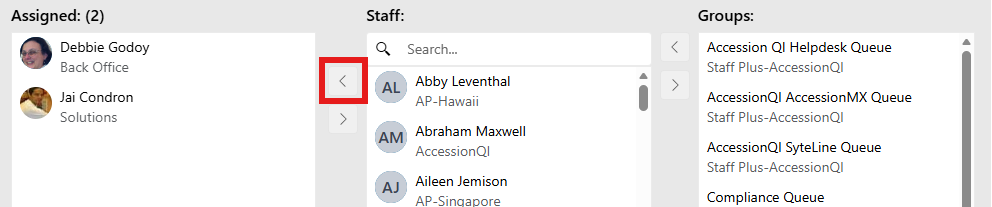
Click each name/queue you want to assign and use the left-pointing arrow on the side of each list to move them to the Assigned Staff list. You can assign multiple users/queues to a ticket at any time by clicking each name one at a time and moving it to Assigned Staff.
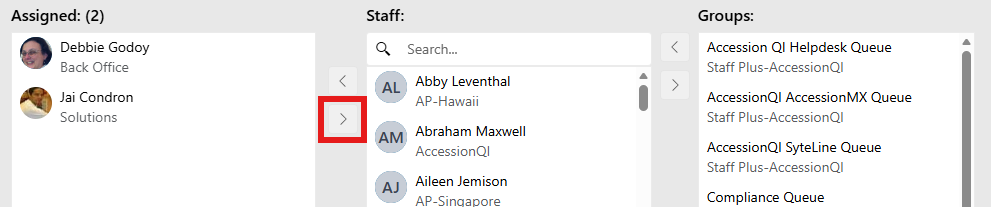
To unassign a user from a ticket, select their name in Assigned Staff and use the right-pointing arrow to remove the name and return it to the staff list.
Once all users have been added/removed as necessary, click Save to keep your changes.
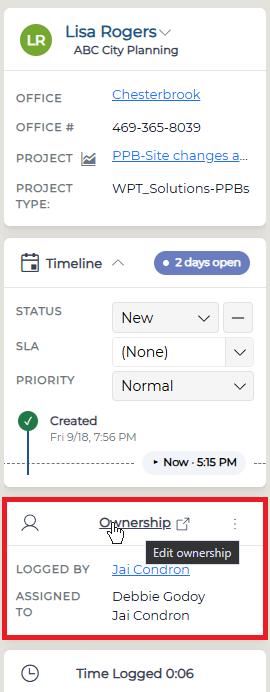
To update a ticket's assignment from within the ticket, click on the Ownership heading from the left side toolbar:
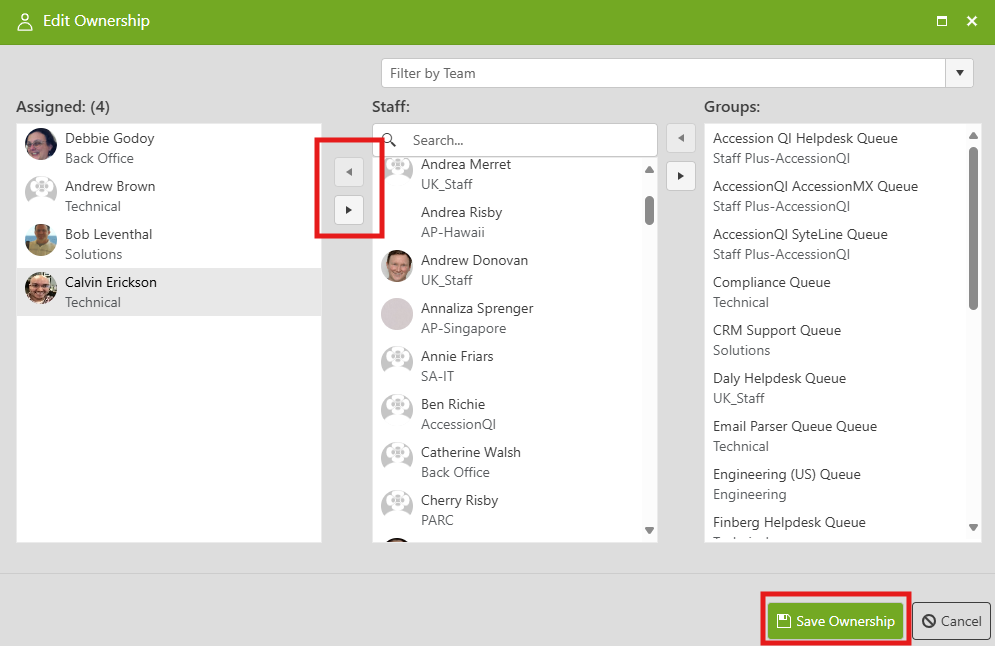
The Edit Ownership window will pop up, allowing users to select a specific staff member from the Staff list, or a queue/group from the Groups list.
Users can be added by using the left-right toggle arrows. Once all desired users have been added to the Assigned list, click Save Ownership to save changes.
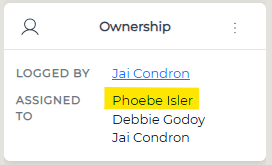
The Ownership field will update accordingly.
While it's not the preferred method, users can also update a ticket's assignment using the edit pencil at the top of the main ticket toolbar.

In the Assigned To field on the right side of the ticket information, select the user you wish to assign to the ticket. All users within the selected team will appear.
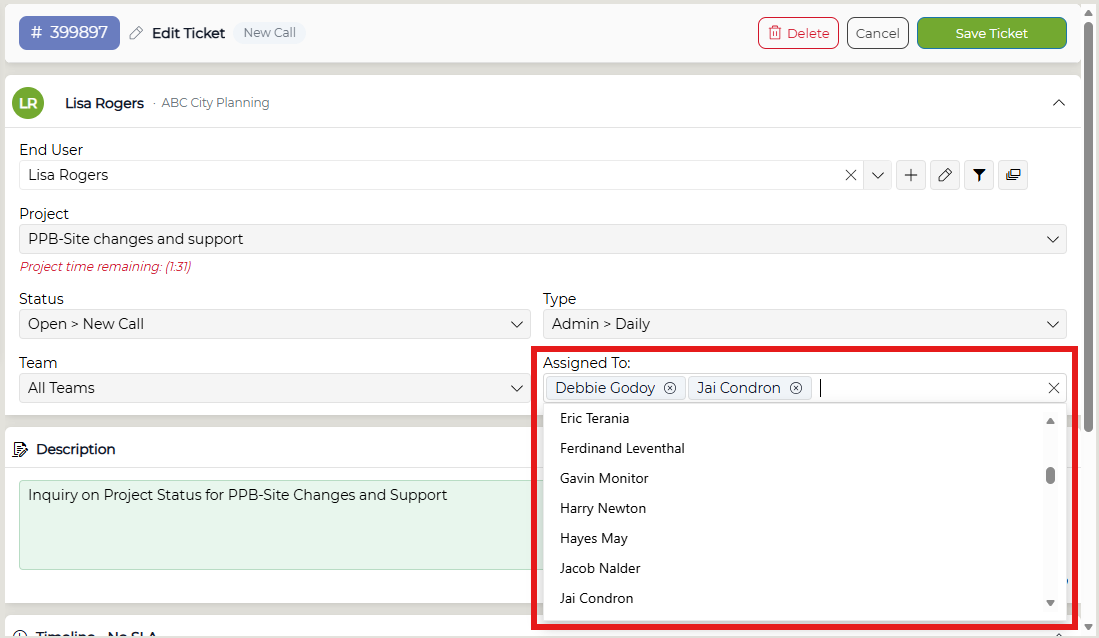
Once all users have been selected, click Save at the bottom of the page to keep your changes.
If System Actions is enabled in the Admin area, an action will be added to the ticket showing the changes. This action cannot be deleted from the ticket. If the System Action function is disabled, no action note will appear when reassigning personnel, but the history will remain in the system. These notes also appear in the Ticket Details reports.
NOTE: Always remember to click Save when making any changes.